<?xml version="1.0" encoding="utf-8"?>
<feed xmlns="http://www.w3.org/2005/Atom">

  <title><![CDATA[ITBox Blog]]></title>
  <link href="http://blog.pengjunjie.com/atom.xml" rel="self"/>
  <link href="http://blog.pengjunjie.com/"/>
  <updated>2020-06-13T18:33:07+08:00</updated>
  <id>http://blog.pengjunjie.com/</id>
  <author>
    <name><![CDATA[]]></name>
    
  </author>
  <generator uri="http://www.mweb.im/">MWeb</generator>
  
  <entry>
    <title type="html"><![CDATA[gogs ubuntu 迁移]]></title>
    <link href="http://blog.pengjunjie.com/15920627380709.html"/>
    <updated>2020-06-13T23:38:58+08:00</updated>
    <id>http://blog.pengjunjie.com/15920627380709.html</id>
    <content type="html"><![CDATA[
<p>前面的服务器到期了，由于新买了服务器，所以需要迁移到新的环境上，由于服务器上有很多其他的东西，又不太愿意直接把整个操作系统克隆到新的服务器上，</p>

<h2 id="toc_0">步骤记录</h2>

<ol>
<li>在目标服务器上安装gogs,具体安装方法在前面的blog有讲过</li>
<li>安装完成后需要访问web然后执行数据库初始化</li>
<li>执行完成初始化后，gogs的文件中才会有gogs-repositories这个文件夹。可以先删除这个文件夹</li>
<li>在原服务器上找到<code>gogs-repositories</code> 这个文件夹，执行命令<code>tar -zcvf gogs-repositories.tar.gz gogs-repositories</code>压缩一下，然后scp到新服务器</li>
<li>备份原服务器的mysql数据库。</li>
<li>停止gogs服务</li>
<li>在新服务器上恢复mysql。也可以使用Navicate的Transmit功能将服务器恢复一下。</li>
<li>将解压后的<code>gogs-repositories</code>文件夹拷贝到刚才删除的目录</li>
<li>重新启动gogs。就能看到恢复后的数据了。</li>
</ol>

<h2 id="toc_1">备注</h2>

<p>恢复之后有一些修改的。</p>

<ol>
<li>由于切换后相关的钩子，由于一般钩子使用服务器ip配置，所以新的内容需要重新配置一下。</li>
</ol>

]]></content>
  </entry>
  
  <entry>
    <title type="html"><![CDATA[homebrew mac 安装]]></title>
    <link href="http://blog.pengjunjie.com/15866680289464.html"/>
    <updated>2020-04-12T13:07:08+08:00</updated>
    <id>http://blog.pengjunjie.com/15866680289464.html</id>
    <content type="html"><![CDATA[
<p>最近由于老的homebrew网站被墙，安装的话需要重新指定到国内的清华镜像来进行安装。</p>

<p>注意在安装脚本之后最好更新一下操作系统，然后再在AppStore下载一个XCode。这样方便管理很多第三方插件。</p>

<h2 id="toc_0">下载安装脚本</h2>

<p><a href="https://raw.githubusercontent.com/Homebrew/install/master/install.sh">https://raw.githubusercontent.com/Homebrew/install/master/install.sh</a></p>

<p>可以翻墙然后下载安装脚本install.sh</p>

<p>下载完之后可以将脚本中的</p>

<p>BREW_REPO修改为当前我们的镜像位置</p>

<pre><code class="language-bash">BREW_REPO=&quot;https://mirrors.tuna.tsinghua.edu.cn/git/homebrew/brew.git&quot;
</code></pre>

<p>修改完成之后在运行 <code>sh install.sh</code> 安装即可</p>

]]></content>
  </entry>
  
  <entry>
    <title type="html"><![CDATA[H5 平台几种方案]]></title>
    <link href="http://blog.pengjunjie.com/15858489505323.html"/>
    <updated>2020-04-03T01:35:50+08:00</updated>
    <id>http://blog.pengjunjie.com/15858489505323.html</id>
    <content type="html"><![CDATA[
<h2 id="toc_0">1. 使用百度H5</h2>

<p>买一台主机配置一下，使用起来比较方便</p>

<h2 id="toc_1">2. 鲁班H5平台</h2>

<p>有源码，但不适用于商用</p>

<h2 id="toc_2">3. swiper</h2>

<p><a href="https://3.swiper.com.cn/">https://3.swiper.com.cn/</a></p>

<p>swiper是一个基础框架库，可以用这个来自己手写</p>

<h2 id="toc_3">4. taro</h2>

<p><a href="https://taro.aotu.io/">https://taro.aotu.io/</a><br/>
框架是京东下面的一个很有意思的框架，可以同时做app、小程序、H5多端，同时提供了比较好的案例可以直接下载使用<br/>
使用react+redux实现，比较有意思，可以研究一下。</p>

<h2 id="toc_4">5. wechat-h5-boilerplate</h2>

<p><a href="https://github.com/panteng/wechat-h5-boilerplate">https://github.com/panteng/wechat-h5-boilerplate</a></p>

<p>可以用这个手写，体验效果还是比较好的<br/>
可以考虑使用</p>

<h2 id="toc_5">6. iSlider</h2>

<p>也是一个可以自己实现的插件工具</p>

<h2 id="toc_6">一篇博客介绍相关H5运营内容</h2>

<p><a href="http://www.ptbird.cn/h5-tool.html">http://www.ptbird.cn/h5-tool.html</a></p>

<h2 id="toc_7">多端开发框架汇总</h2>

<p><a href="https://blog.fundebug.com/2019/03/28/compare-wechat-app-frameworks/">https://blog.fundebug.com/2019/03/28/compare-wechat-app-frameworks/</a></p>

<h2 id="toc_8">腾讯开源</h2>

<p><a href="https://opensource.tencent.com/">https://opensource.tencent.com/</a></p>

]]></content>
  </entry>
  
  <entry>
    <title type="html"><![CDATA[阿里云配置云企业网互通]]></title>
    <link href="http://blog.pengjunjie.com/15856378432221.html"/>
    <updated>2020-03-31T14:57:23+08:00</updated>
    <id>http://blog.pengjunjie.com/15856378432221.html</id>
    <content type="html"><![CDATA[
<ol>
<li>两边创建云企业网，在VPC菜单的快捷连接中可以找到云企业网配置</li>
<li>将自己的</li>
<li>最后记得使用安全组加入</li>
</ol>

<p>但是安全组的模式只支持同一个大区的。</p>

]]></content>
  </entry>
  
  <entry>
    <title type="html"><![CDATA[阿里云 ubuntu 18 磁盘 在线扩容]]></title>
    <link href="http://blog.pengjunjie.com/15856314984794.html"/>
    <updated>2020-03-31T13:11:38+08:00</updated>
    <id>http://blog.pengjunjie.com/15856314984794.html</id>
    <content type="html"><![CDATA[
<p>ubuntu的磁盘使用有两种方式，一是系统盘，系统盘会将磁盘分区划分到/的根分区下。<br/>
放在根目录的好处是，不管怎么使用，根分区的大小在一个磁盘上，方便移动。</p>

<p>如果在阿里云下再购买一张磁盘的话，那么有两种方式：购买新磁盘和对系统盘扩容。<br/>
对系统盘扩容的好处就是上面说的方便使用，对整个磁盘都可以进行扩容了。<br/>
新买一块磁盘的话，阿里云只能在其下的某个目录挂在磁盘(如果默认没开启虚拟磁盘组的情况)。这样不方便的是只能将磁盘大小扩展到某个目录下，在这个目录下使用。但是好处是当前这个磁盘可以单独备份，方便挂载和卸载的管理。</p>

<p>我们现在使用的方式是扩展磁盘之后，对跟目录进行扩容</p>

<p>首先安装两个依赖包</p>

<pre><code class="language-bash">apt install cloud-guest-utils
apt install xfsprogs
</code></pre>

<p>输入命令：</p>

<pre><code class="language-text">growpart /dev/vda 1
</code></pre>

<p>然后接着输入：</p>

<pre><code class="language-text">resize2fs /dev/vda1
</code></pre>

<p>运行<code>df -h</code>命令查看云盘分区大小。如果分区变大，表示已经成功扩容。</p>

]]></content>
  </entry>
  
  <entry>
    <title type="html"><![CDATA[ubuntu 服务器运维纪要]]></title>
    <link href="http://blog.pengjunjie.com/15854717055554.html"/>
    <updated>2020-03-29T16:48:25+08:00</updated>
    <id>http://blog.pengjunjie.com/15854717055554.html</id>
    <content type="html"><![CDATA[
<p>1.CPU占用最多的前10个进程：</p>

<pre><code class="language-bash">ps auxw|head -1;ps auxw|sort -rn -k3|head -10
</code></pre>

<p>2.内存消耗最多的前10个进程</p>

<pre><code class="language-bash">ps auxw|head -1;ps auxw|sort -rn -k4|head -10
</code></pre>

<p>3.虚拟内存使用最多的前10个进程</p>

<pre><code class="language-bash">ps auxw|head -1;ps auxw|sort -rn -k5|head -10
</code></pre>

]]></content>
  </entry>
  
  <entry>
    <title type="html"><![CDATA[The Django Speed Handbook: making a Django app faster]]></title>
    <link href="http://blog.pengjunjie.com/15854598786629.html"/>
    <updated>2020-03-29T13:31:18+08:00</updated>
    <id>http://blog.pengjunjie.com/15854598786629.html</id>
    <content type="html"><![CDATA[
<p>这篇文章真的写的非常好，讲解到了django是如何一步一步做性能优化的，可以优化的点还是很多的。</p>

<p><a href="https://openfolder.sh/django-faster-speed-tutorial">February 25, 2020</a></p>

<p>Over the course of developing several Django apps, I’ve learned quite a bit about speed optimizations. Some parts of this process, whether on the backend or frontend, are not well-documented. I’ve decided to collect most of what I know in this article.</p>

<p><strong>If you haven’t taken a close look at the performance of your web-app yet, you’re bound to find something good here</strong>.</p>

<p> What’s in this article?</p>

<h2 id="toc_0">Why speed is important</h2>

<p>On the web, 100 milliseconds can make a significant difference and 1 second is a lifetime. Countless studies indicate that faster loading times are associated with better conversion-rates, user-retention, and organic traffic from search engines. Most importantly, they provide a better user experience.</p>

<h2 id="toc_1">Different apps, different bottlenecks</h2>

<p>There are <em>many</em> techniques and practices to optimize your web-app’s performance. It’s easy to get carried away. <strong>Look for the highest return-to-effort ratio</strong>. Different web-apps have different bottlenecks and therefore will gain the most when those bottlenecks are taken care of. Depending on your app, some tips will be more useful than others.</p>

<p>While this article is catered to Django developers, the speed optimization tips here can be adjusted to pretty much any stack. On the frontend side, it’s especially useful for people hosting with Heroku and who do not have access to a CDN service.</p>

<h2 id="toc_2">Analyzing and debugging performance issues</h2>

<p>On the backend, I recommend the tried-and-true <a href="https://github.com/jazzband/django-debug-toolbar"><code>django-debug-toolbar</code></a>. It will help you analyze your request/response cycles and see where most of the time is spent. Especially useful because it provides database query execution times and provides a nice SQL <code>EXPLAIN</code> in a separate pane that appears in the browser.</p>

<p><a href="https://developers.google.com/speed/pagespeed/insights/" title="Google PageSpeed Insights">Google PageSpeed</a> will display mainly frontend related advice, but some can apply to the backend as well (like server response times). PageSpeed scores do not directly correlate with loading times but should give you a good picture of where the low-hanging fruits for your app are. In development environments, you can use <a href="https://developers.google.com/web/tools/lighthouse" title="Lighthouse">Google Chrome’s Lighthouse</a> which provides the same metrics but can work with local network URIs. <a href="https://gtmetrix.com/" title="GTmetrix">GTmetrix</a> is another detail-rich analysis tool.</p>

<h2 id="toc_3">Disclaimer</h2>

<p>Some people will tell you that some of the advice here is wrong or lacking. That’s okay; this is not meant to be a bible or the ultimate go-to-guide. Treat these techniques and tips as ones you may use, not should or must use. Different needs call for different setups.</p>

<h2 id="toc_4">Backend: the database layer</h2>

<p>Starting with the backend is a good idea since it’s usually the layer that’s supposed to do most of the heavy lifting behind the scenes.</p>

<p>There’s little doubt in my mind which two ORM functionalities I want to mention first: these are <code>select_related</code> and <code>prefetch_related</code>. They both deal specifically with retrieving related objects and will usually improve speed by minimizing the number of database queries.</p>

<h3 id="toc_5">select_related</h3>

<p>Let’s take a music web-app for example, which might have these models:</p>

<pre><code class="language-text"># music/models.py, some fields &amp; code omitted for brevity
class RecordLabel(models.Model):
    name = models.CharField(max_length=560)

class MusicRelease(models.Model):
    title = models.CharField(max_length=560)
    release_date = models.DateField()

class Artist(models.Model):
    name = models.CharField(max_length=560)
    label = models.ForeignKey(
        RecordLabel,
        related_name=&quot;artists&quot;,
        on_delete=models.SET_NULL
    )
    music_releases = models.ManyToManyField(
        MusicRelease, 
        related_name=&quot;artists&quot;
    )
</code></pre>

<p>So each artist is related to one and only one record company and each record company can sign multiple artists: a classic one-to-many relationship. Artists have many music-releases, and each release can belong to one artist or more.</p>

<p>I’ve created some dummy data:</p>

<ul>
<li>20 record labels</li>
<li>each record label has 25 artists</li>
<li>each artist has 100 music releases</li>
</ul>

<p>Overall, we have ~50,500 of these objects in our tiny database.</p>

<p>Now let’s wire-up a fairly standard function that pulls our artists and their label. <code>django_query_analyze</code> is a decorator I wrote to count the number of database queries and time to run the function. Its implementation can be found in the appendix.</p>

<pre><code class="language-text"># music/selectors.py
@django_query_analyze
def get_artists_and_labels():
    result = []
    artists = Artist.objects.all()
    for artist in artists:
        result.append({&quot;name&quot;: artist.name, &quot;label&quot;: artist.label.name})
    return result
</code></pre>

<p><code>get_artists_and_labels</code> is a regular function which you may use in a Django view. It returns a list of dictionaries, each contains the artist’s name and their label. I’m accessing <code>artist.label.name</code> to force-evaluate the Django QuerySet; you can equate this to trying to access these objects in a Jinja template:</p>

<pre><code class="language-text">{% for artist in artists_and_labels %}
    &lt;p&gt;Name: {{ artist.name }}, Label: {{ artist.label.name }}&lt;/p&gt;
{% endfor %}
</code></pre>

<p>Now let’s run this function:</p>

<pre><code class="language-text">ran function get_artists_and_labels
--------------------
number of queries: 501
Time of execution: 0.3585s
</code></pre>

<p>So we’ve pulled 500 artists and their labels in 0.36 seconds, but more interestingly — we’ve hit the database 501 times. Once for all the artists, and 500 more times: <em>once for each</em> of the artists’ labels. This is called “The N+1 problem”. Let’s tell Django to retrieve each artist’s <code>label</code> in the same query with <code>select_related</code>:</p>

<pre><code class="language-text">@django_query_analyze
def get_artists_and_labels_select_related():
    result = []
    artists = Artist.objects.select_related(&quot;label&quot;) # select_related
    for artist in artists:
        result.append(
            {&quot;name&quot;: artist.name, &quot;label&quot;: artist.label.name if artist.label else &quot;N/A&quot;}
        )
    return result
</code></pre>

<p>Now let’s run this:</p>

<pre><code class="language-text">ran function get_artists_and_labels_select_related
--------------------
number of queries: 1
Time of execution: 0.01481s
</code></pre>

<p>500 queries less and a 96% speed improvement.</p>

<h3 id="toc_6">prefetch_related</h3>

<p>Let’s look at another function, for getting each artist’s first 100 music releases:</p>

<pre><code class="language-text">@django_query_analyze
def get_artists_and_releases():
    result = []
    artists = Artist.objects.all()[:100]
    for artist in artists:
        result.append(
            {
                &quot;name&quot;: artist.name,
                &quot;releases&quot;: [release.title for release in artist.music_releases.all()],
            }
        )
    return result
</code></pre>

<p>How long does it take to fetch 100 artists and 100 releases for each one of them?</p>

<pre><code class="language-text">ran function get_artists_and_releases
--------------------
number of queries: 101
Time of execution: 0.18245s
</code></pre>

<p>Let’s change the <code>artists</code> variable in this function and add <code>select_related</code> so we can bring the number of queries down and hopefully get a speed boost:</p>

<pre><code class="language-text">artists = Artist.objects.select_related(&quot;music_releases&quot;)
</code></pre>

<p>If you actually do that, you’ll get an error:</p>

<pre><code class="language-text">django.core.exceptions.FieldError: Invalid field name(s) given in select_related: &#39;music_releases&#39;. Choices are: label
</code></pre>

<p>That’s because <code>select_related</code> can only be used to cache ForeignKey or OneToOneField attributes. The relationship between <code>Artist</code> and <code>MusicRelease</code> is many-to-many though, and that’s where <code>prefetch_ related</code> comes in:</p>

<pre><code class="language-text">@django_query_analyze
def get_artists_and_releases_prefetch_related():
    result = []
    artists = Artist.objects.all()[:100].prefetch_related(&quot;music_releases&quot;) # prefetch_related
    for artist in artists:
        result.append(
            {
                &quot;name&quot;: artist.name,
                &quot;releases&quot;: [rel.title for rel in artist.music_releases.all()],
            }
        )
    return result
</code></pre>

<p><code>select_related</code> can only cache the “one” side of the “one-to-many” relationship, or either side of a “one-to-one” relationship. You can use <code>prefetch_related</code> for all other caching, including the many side in one-to-many relationships, and many-to-many relationships. Here’s the improvement in our example:</p>

<pre><code class="language-text">ran function get_artists_and_releases_prefetch_related
--------------------
number of queries: 2
Time of execution: 0.13239s
</code></pre>

<p>Nice.</p>

<p>Things to keep in mind about <code>select_related</code> and <code>prefetch_related</code>:</p>

<ul>
<li>If you aren’t pooling your database connections, the gains will be even bigger because of fewer roundtrips to the database.</li>
<li>For very large result-sets, running <code>prefetch_related</code> can actually make things slower.</li>
<li>One database query isn’t <em>necessarily</em> faster than two or more.</li>
</ul>

<h3 id="toc_7">Indexing</h3>

<p>Indexing your database columns can have a big impact on query performance. Why then, is it not the first clause of this section? Because indexing is more complicated than simply scattering <code>db_index=True</code> on your model fields.</p>

<p>Creating an index on frequently accessed columns can improve the speed of look-ups pertaining to them. Indexing comes at the cost of additional writes and storage space though, so you should always measure your benefit:cost ratio. In general, creating indices on a table will slow down inserts/updates.</p>

<h3 id="toc_8">Take only what you need</h3>

<p>When possible, use <code>values()</code> and especially <code>values_list()</code> to only pull the needed properties of your database objects. Continuing our example, if we only want to display a list of artist names and don’t need the full ORM objects, it’s usually better to write the query like so:</p>

<pre><code class="language-text">artist_names = Artist.objects.values(&#39;name&#39;) 
# &lt;QuerySet [{&#39;name&#39;: &#39;Chet Faker&#39;}, {&#39;name&#39;: &#39;Billie Eilish&#39;}]&gt;

artist_names = Artist.objects.values_list(&#39;name&#39;) 
# &lt;QuerySet [(&#39;Chet Faker&#39;,), (&#39;Billie Eilish&#39;,)]&gt;

artist_names = Artist.objects.values_list(&#39;name&#39;, flat=True) 
# &lt;QuerySet [&#39;Chet Faker&#39;, &#39;Billie Eilish&#39;]&gt;
</code></pre>

<p>Haki Benita, a true database expert (unlike me), reviewed some parts of this section. You should read <a href="http://hakibenita.com/">Haki’s blog</a>.</p>

<h2 id="toc_9">Backend: the request layer</h2>

<p>The next layer we’re going to look at is the request layer. These are your Django views, context processors, and middleware. Good decisions here will also lead to better performance.</p>

<h3 id="toc_10">Pagination</h3>

<p>In the section about <code>select_related</code> we were using the function to return 500 artists and their labels. In many situations returning this many objects is either unrealistic or undesirable. The section about <a href="https://docs.djangoproject.com/en/2.2/topics/pagination/" title="Paginate Django">pagination in the Django docs</a> is crystal clear on how to work with the <code>Paginator</code> object. Use it when you don’t want to return more than <code>N</code> objects to the user, or when doing so makes your web-app too slow.</p>

<h3 id="toc_11">Asynchronous execution/background tasks</h3>

<p>There are times when a certain action inevitably takes a lot of time. For example, a user requests to export a big number of objects from the database to an XML file. If we’re doing everything in the same process, the flow looks like this:</p>

<pre><code class="language-text">web: user requests file -&gt; process file -&gt; return response
</code></pre>

<p>Say it takes 45 seconds to process this file. You’re not really going to let the user wait all this time for a response. First, because it’s a horrible experience from a UX standpoint, and second, because some hosts will actually cut the process short if your app doesn’t respond with a proper HTTP response after N seconds.</p>

<p>In most cases, the sensible thing to do here is to remove this functionality from the request-response loop and relay it to a different process:</p>

<pre><code class="language-text">web: user requests file -&gt; delegate to another process -&gt; return response 
                           |
                           v
background process:        receive job -&gt; process file -&gt; notify user
</code></pre>

<p>Background tasks are beyond the scope of this article but if you’ve ever needed to do something like the above I’m sure you’ve heard of libraries like <a href="http://www.celeryproject.org/" title="Celery">Celery</a>.</p>

<h3 id="toc_12">Compressing Django’s HTTP responses</h3>

<p>This is not to be confused with static-file compression, which is mentioned later in the article.</p>

<p>Compressing Django’s HTTP/JSON responses also stands to save your users some latency. How much exactly? Let’s check the number of bytes in our response’s body without any compression:</p>

<pre><code class="language-text">Content-Length: 66980
Content-Type: text/html; charset=utf-8
</code></pre>

<p>So our HTTP response is around 67KB. Can we do better? Many use Django’s built-in <code>GZipMiddleware</code> for <code>gzip</code> compression, but today the newer and more effective <code>brotli</code> enjoys the same support across browsers (except IE11, of course).</p>

<p><strong>Important:</strong> Compression can <em>potentially</em> open your website to security breaches, as mentioned in the <a href="https://docs.djangoproject.com/en/2.2/ref/middleware/#module-django.middleware.gzip">GZipMiddleware section</a> of the Django docs.</p>

<p>Let’s install the excellent <a href="https://pypi.org/project/django-compression-middleware/" title="django-compression-middleware on PyPi">django-compression-middleware</a> library. It will choose the fastest compression mechanism supported by the browser by checking the request’s <code>Accept-Encoding</code> headers:</p>

<pre><code class="language-text">pip install django-compression-middleware
</code></pre>

<p>Include it in our Django app’s middleware:</p>

<pre><code class="language-text">MIDDLEWARE = [
    &quot;django.middleware.security.SecurityMiddleware&quot;,
    &quot;django.contrib.sessions.middleware.SessionMiddleware&quot;,
    &quot;django.contrib.auth.middleware.AuthenticationMiddleware&quot;,
    &quot;compression_middleware.middleware.CompressionMiddleware&quot;,
    # ...
]
</code></pre>

<p>And inspect the body’s <code>Content-Length</code> again:</p>

<pre><code class="language-text">Content-Encoding: br
Content-Length: 7239
Content-Type: text/html; charset=utf-8
</code></pre>

<p>The body size is now 7.24KB, 89% smaller. You can certainly argue this kind of operation should be delegated to a dedicated server like Ngnix or Apache. I’d argue that everything is a balance between simplicity and resources.</p>

<h3 id="toc_13">Caching</h3>

<p>Caching is the process of storing the result of a certain calculation for faster future retrieval. Django has an excellent <a href="https://docs.djangoproject.com/en/3.0/topics/cache/">caching framework</a> that lets you do this on a variety of levels and using different storage backends.</p>

<p>Caching can be tricky in data-driven apps: you’d never want to cache a page that’s supposed to display up-to-date, realtime information at all times. So, the big challenge isn’t so much setting up caching as it is figuring out what should be cached, for how long, and understanding when or how the cache is invalidated.</p>

<p>Before resorting to caching, make sure you’ve made proper optimizations at the database-level and/or on the frontend. If designed and queried properly, databases are ridiculously fast at pulling out relevant information at scale.</p>

<h2 id="toc_14">Frontend: where it gets hairier</h2>

<p>Reducing static files/assets sizes can significantly speed up your web application. Even if you’ve done everything right on the backend, serving your images, CSS, and JavaScript files inefficiently will degrade your application’s speed.</p>

<p>Between compiling, minifying, compressing, and purging, it’s easy to get lost. Let’s try not to.</p>

<h3 id="toc_15">Serving static-files</h3>

<p>You have several options on where and how to serve static files. <a href="https://docs.djangoproject.com/en/2.2/howto/static-files/deployment/#deploying-static-files" title="Django Docs: deploying static files">Django’s docs</a> mention a dedicated server running Ngnix and Apache, Cloud/CDN, or the same-server approach.</p>

<p>I’ve gone with a bit of a hybrid attitude: images are served from a CDN, large file-uploads go to S3, but all serving and handling of other static assets (CSS, JavaScript, etc…) is done using WhiteNoise (covered in-detail later).</p>

<h3 id="toc_16">Vocabulary</h3>

<p>Just to make sure we’re on the same page, here’s what I mean when I say:</p>

<ul>
<li>Compiling: If you’re using SCSS for your stylesheets, you’ll first have to compile those to CSS because browsers don’t understand SCSS.</li>
<li>Minifying: reducing whitespace and removing comments from CSS and JS files can have a significant impact on their size. Sometimes this process involves uglifying: the renaming of long variable names to shorter ones, etc…</li>
<li>Compressing/Combining: for CSS and JS, combining multiple files to one. For images, usually means removing some data from images to make their files size smaller.</li>
<li>Purging: remove unneeded/unused code. In CSS for example: removing selectors that aren’t used.</li>
</ul>

<h3 id="toc_17">Serving static files from Django with WhiteNoise</h3>

<p>WhiteNoise allows your Python web-application to serve static assets on its own. <a href="http://whitenoise.evans.io/en/stable/index.html#what-s-the-point-in-whitenoise-when-i-can-do-the-same-thing-in-a-few-lines-of-apache-nginx-config">As its author states</a>, it comes in when other options like Nginx/Apache are unavailable or undesired.</p>

<p>Let’s install it:</p>

<pre><code class="language-text">pip install whitenoise[brotli]
</code></pre>

<p>Before enabling WhiteNoise, make sure your <code>STATIC_ROOT</code> is defined in <code>settings.py</code>:</p>

<pre><code class="language-text">STATIC_ROOT = os.path.join(BASE_DIR, &quot;staticfiles&quot;)
</code></pre>

<p>To enable WhiteNoise, add its WhiteNoise middleware right below <code>SecurityMiddleware</code> in <code>settings.py</code>:</p>

<pre><code class="language-text">MIDDLEWARE = [
  &#39;django.middleware.security.SecurityMiddleware&#39;,
  &#39;whitenoise.middleware.WhiteNoiseMiddleware&#39;,
  # ...
]
</code></pre>

<p>In production, you’ll have to run <code>manage.py collectstatic</code> for WhiteNoise to work.</p>

<p>While this step is not mandatory, it’s strongly advised to add caching and compression:</p>

<pre><code class="language-text">STATICFILES_STORAGE = &#39;whitenoise.storage.CompressedManifestStaticFilesStorage&#39;

</code></pre>

<p>Now whenever it encounters a <code>{% static %}</code> tag in templates, WhiteNoise will take care of compressing and caching the file for you. It also takes care of cache-invalidation.</p>

<p>One more important step: To ensure that we get a consistent experience between development and production environments, we add <code>runserver_nostatic</code>:</p>

<pre><code class="language-text">INSTALLED_APPS = [
    &#39;whitenoise.runserver_nostatic&#39;,
    &#39;django.contrib.staticfiles&#39;,
    # ...
]
</code></pre>

<p>This can be added regardless of whether <code>DEBUG</code> is <code>True</code> or not, because you don’t usually run Django via <code>runserver</code> in production.</p>

<p>I found it useful to also increase the caching time:</p>

<pre><code class="language-text"># Whitenoise cache policy
WHITENOISE_MAX_AGE = 31536000 if not DEBUG else 0 # 1 year
</code></pre>

<p>Wouldn’t this cause problems with cache-invalidation? No, because WhiteNoise creates <em>versioned</em> files when you run <code>collectstatic</code>:</p>

<pre><code class="language-text">&lt;link rel=&quot;stylesheet&quot; href=&quot;/static/CACHE/css/4abd0e4b71df.css&quot; type=&quot;text/css&quot; media=&quot;all&quot;&gt;
</code></pre>

<p>So when you deploy your application again, your static files are overwritten and will have a different name, thus the previous cache becomes irrelevant.</p>

<h3 id="toc_18">Compressing and combining with django-compressor</h3>

<p>WhiteNoise already compresses static files, so <code>django-compressor</code> is optional. But the latter offers an additional enhancement: combining the files. To use compressor with WhiteNoise we have to take a few extra steps.</p>

<p>Let’s say the user loads an HTML document that links three <code>.css</code> files:</p>

<pre><code class="language-text">&lt;head&gt;
  &lt;link rel=&quot;stylesheet&quot; href=&quot;base.css&quot; type=&quot;text/css&quot; media=&quot;all&quot;&gt;
  &lt;link rel=&quot;stylesheet&quot; href=&quot;additions.css&quot; type=&quot;text/css&quot; media=&quot;all&quot;&gt;
  &lt;link rel=&quot;stylesheet&quot; href=&quot;new_components.css&quot; type=&quot;text/css&quot; media=&quot;all&quot;&gt;
&lt;/head&gt;
</code></pre>

<p>Your browser will make three different requests to these locations. In many scenarios it’s more effective to combine these different files when deploying, and <code>django-compressor</code> does that with its <code>{% compress css %}</code> template tag:</p>

<p>This:</p>

<pre><code class="language-text">{% load compress %}
&lt;head&gt;
  {% compress css %}
    &lt;link rel=&quot;stylesheet&quot; href=&quot;base.css&quot; type=&quot;text/css&quot; media=&quot;all&quot;&gt;
    &lt;link rel=&quot;stylesheet&quot; href=&quot;additions.css&quot; type=&quot;text/css&quot; media=&quot;all&quot;&gt;
    &lt;link rel=&quot;stylesheet&quot; href=&quot;new_components.css&quot; type=&quot;text/css&quot; media=&quot;all&quot;&gt;
  {% compress css %}
&lt;/head&gt;
</code></pre>

<p>Becomes:</p>

<pre><code class="language-text">&lt;head&gt;
  &lt;link rel=&quot;stylesheet&quot; href=&quot;combined.css&quot; type=&quot;text/css&quot; media=&quot;all&quot;&gt;
&lt;/head&gt;
</code></pre>

<p>Let’s go over the steps to make <code>django-compressor</code> and WhiteNoise play well. Install:</p>

<pre><code class="language-text">pip install django_compressor
</code></pre>

<p>Tell compressor where to look for static files:</p>

<pre><code class="language-text">COMPRESS_STORAGE = &quot;compressor.storage.GzipCompressorFileStorage&quot;
COMPRESS_ROOT = os.path.abspath(STATIC_ROOT)
</code></pre>

<p>Because of the way these two libraries intercept the request-response cycle, they’re incompatible with their default configurations. We can overcome this by modifying some settings.</p>

<p>I prefer to use environment variables in <code>.env</code> files and have one Django <code>settings.py</code>, but if you have <code>settings/dev.py</code> and <code>settings/prod.py</code>, you’ll know how to convert these values:</p>

<p><code>main_project/settings.py</code>:</p>

<pre><code class="language-text">from decouple import config
#...

COMPRESS_ENABLED =  config(&quot;COMPRESS_ENABLED&quot;, cast=bool)
COMPRESS_OFFLINE = config(&quot;COMPRESS_OFFLINE&quot;, cast=bool)
</code></pre>

<p><code>COMPRESS_OFFLINE</code> is <code>True</code> in production and <code>False</code> in development. <code>COMPRESS_ENABLED</code> is <code>True</code> in both</p>

<p>.</p>

<p>With offline compression, one must run <code>manage.py compress</code> on every deployment. On Heroku, you’ll want to disable the platform from automatically running <code>collectstatic</code> for you (on by default) and instead opt to do that in the <code>post_compile</code> hook, which Heroku will run when you deploy. If you don’t already have one, create a folder called <code>bin</code> at the root of your project and inside of it a file called <code>post_compile</code> with the following:</p>

<pre><code class="language-text">python manage.py collectstatic --noinput
python manage.py compress --force
python manage.py collectstatic --noinput
</code></pre>

<p>Another nice thing about compressor is that it can compress SCSS/SASS files:</p>

<pre><code class="language-text">COMPRESS_PRECOMPILERS = (
    (&quot;text/x-sass&quot;, &quot;django_libsass.SassCompiler&quot;),
    (&quot;text/x-scss&quot;, &quot;django_libsass.SassCompiler&quot;),
)
</code></pre>

<h3 id="toc_19">Minifying CSS &amp; JS</h3>

<p>Another important thing to apply when talking about load-times and bandwidth usage is minifying: the process of (automatically) decreasing your code’s file-size by eliminating whitespace and removing comments.</p>

<p>There are several approaches to take here, but if you’re using <code>django-compressor</code> specifically, you get that for free as well. You just need to add the following (or any other filters compressor supports) to your <code>settings.py</code> file:</p>

<pre><code class="language-text">COMPRESS_FILTERS = {
    &quot;css&quot;: [
        &quot;compressor.filters.css_default.CssAbsoluteFilter&quot;,
        &quot;compressor.filters.cssmin.rCSSMinFilter&quot;,
    ],
    &quot;js&quot;: [&quot;compressor.filters.jsmin.JSMinFilter&quot;],
}
</code></pre>

<h3 id="toc_20">Defer-loading JavaScript</h3>

<p>Another thing that contributes to slower performance is loading external scripts. The gist of it is that browsers will try to fetch and execute JavaScript files in the <code>&lt;head&gt;</code> tag as they are encountered <em>and before</em> parsing the rest of the page:</p>

<pre><code class="language-text">&lt;html&gt;
  &lt;head&gt;
    &lt;script src=&quot;https://will-block.js&quot;&gt;&lt;/script&gt;
      &lt;script src=&quot;https://will-also-block.js&quot;&gt;&lt;/script&gt;
  &lt;/head&gt;
&lt;/html&gt;
</code></pre>

<p>We can use the <code>async</code> and <code>defer</code> keywords to mitigate this:</p>

<pre><code class="language-text">&lt;html&gt;
  &lt;head&gt;
      &lt;script async src=&quot;somelib.somecdn.js&quot;&gt;&lt;/script&gt;
  &lt;/head&gt;
&lt;/html&gt;
</code></pre>

<p><code>async</code> and <code>defer</code> both allow the script to be fetched asynchronously without blocking. One of the key differences between them is <em>when</em> the script is allowed to execute: With <code>async</code>, once the script has been downloaded, all parsing is paused until the script has finished executing, while with <code>defer</code> the script is executed only after all HTML has been parsed.</p>

<p>I suggest referring to <a href="https://flaviocopes.com/javascript-async-defer/" title="Flavio Copes">Flavio Copes’ article</a> on the <code>defer</code> and <code>aysnc</code> keywords. Its general conclusion is:</p>

<blockquote>
<p>The best thing to do to speed up your page loading when using scripts is to put them in the <code>head</code>, and add a <code>defer</code> attribute to your <code>script</code> tag.</p>
</blockquote>

<h3 id="toc_21">Lazy-loading images</h3>

<p>Lazily loading images means that we only request them when or a little before they enter the client’s (user’s) viewport. It saves time and bandwidth ($ on cellular networks) for your users. With excellent, dependency-free JavaScript libraries like <a href="https://github.com/verlok/lazyload">LazyLoad</a>, there really isn’t an excuse to not lazy-load images. Moreover, Google Chrome natively supports the <code>lazy</code> attribute since version 76.</p>

<p>Using the aforementioned LazyLoad is fairly simple and the library is very customizable. In my own app, I want it to apply on images only if they have a <code>lazy</code> class, and start loading an image 300 pixels before it enters the viewport:</p>

<pre><code class="language-text">$(document).ready(function (e) {
  new LazyLoad({
    elements_selector: &quot;.lazy&quot;, // classes to apply to
    threshold: 300 // pixel threshold
  })
})
</code></pre>

<p>Now let’s try it with an existing image:</p>

<pre><code class="language-text">&lt;img class=&quot;album-artwork&quot; alt=&quot;{{ album.title }}&quot;  src=&quot;{{ album.image_url }}&quot;&gt;
</code></pre>

<p>We replace the <code>src</code> attribute with <code>data-src</code> and add <code>lazy</code> to the class attribute:</p>

<pre><code class="language-text">&lt;img class=&quot;album-artwork lazy&quot; alt=&quot;{{ album.title }}&quot;  data-src=&quot;{{ album.image_url }}&quot;&gt;
</code></pre>

<p>Now the client will request this image when the latter is 300 pixels under the viewport.</p>

<p>If you have many images on certain pages, using lazy-loading will dramatically improve your load times.</p>

<h3 id="toc_22">Optimize &amp; dynamically scale images</h3>

<p>Another thing to consider is image-optimization. Beyond compression, there are two more techniques to consider here.</p>

<p>First, file-format optimization. There are newer formats like <code>WebP</code> that are presumably 25-30% smaller than your average <code>JPEG</code> image at the same quality. As of 02/2020 WebP has <a href="https://caniuse.com/#feat=webp">decent but incomplete</a> browser support, so you’ll have to provide a standard format fallback if you want to use it.</p>

<p>Second, serving different image-sizes to different screen sizes: if some mobile device has a maximum viewport width of 650px, then why serve it the same 1050px image you’re displaying to 13″ 2560px retina display?</p>

<p>Here, too, you can choose the level of granularity and customization that suits your app. For simpler cases, You can use the <code>srcset</code> attribute to control sizing and be done at that, but if for example you’re also serving <code>WebP</code> with <code>JPEG</code> fallbacks for the same image, you may use the <code>&lt;picture&gt;</code> element with multiple sources and source-sets.</p>

<p>If the above sounds complicated for you as it does for me, <a href="https://dev.to/jsco/a-comprehensive-guide-to-responsive-images-picture-srcset-source-etc-4adj">this guide</a> should help explain the terminology and use-cases.</p>

<h3 id="toc_23">Unused CSS: Removing imports</h3>

<p>If you’re using a CSS framework like Bootstrap, don’t just include all of its components blindly. In fact, I would start with commenting out all of the non-essential components and only add those gradually as the need arises. Here’s a snippet of my <code>bootstrap.scss</code>, where all of its different parts are imported:</p>

<pre><code class="language-text">// ...

// Components
// ...
@import &quot;bootstrap/dropdowns&quot;;
@import &quot;bootstrap/button-groups&quot;;
@import &quot;bootstrap/input-groups&quot;;
@import &quot;bootstrap/navbar&quot;;
// @import &quot;bootstrap/breadcrumbs&quot;;
// @import &quot;bootstrap/badges&quot;;
// @import &quot;bootstrap/jumbotron&quot;;

// Components w/ JavaScript
@import &quot;bootstrap/modals&quot;;
@import &quot;bootstrap/tooltip&quot;;
@import &quot;bootstrap/popovers&quot;;
// @import &quot;bootstrap/carousel&quot;;
</code></pre>

<p>I don’t use things like <code>badges</code> or <code>jumbotron</code> so I can safely comment those out.</p>

<h3 id="toc_24">Unused CSS: Purging CSS with PurgeCSS</h3>

<p>A more aggressive and more complicated approach is using a library like <a href="https://github.com/FullHuman/purgecss" title="PurgeCSS Github repository">PurgeCSS</a>, which analyzes your files, detects CSS content that’s not in use, and removes it. PurgeCSS is an NPM package, so if you’re hosting Django on Heroku, you’ll need to install the Node.js buildpack side-by-side with your Python one.</p>

<h2 id="toc_25">Conclusion</h2>

<p>I hope you’ve found at least one area where you can make your Django app faster. If you have any questions, suggestions, or feedback don’t hesitate to <a href="https://twitter.com/SHxKM">drop me a line on Twitter</a>.</p>

<h2 id="toc_26">Appendices</h2>

<h3 id="toc_27">Decorator used for QuerySet performance analysis</h3>

<p>Below is the code for the <code>django_query_analyze</code> decorator:</p>

<pre><code class="language-text">from timeit import default_timer as timer
from django.db import connection, reset_queries

def django_query_analyze(func):
    &quot;&quot;&quot;decorator to perform analysis on Django queries&quot;&quot;&quot;

    def wrapper(*args, **kwargs):

        avs = []
        query_counts = []
        for _ in range(20):
            reset_queries()
            start = timer()
            func(*args, **kwargs)
            end = timer()
            avs.append(end - start)
            query_counts.append(len(connection.queries))
            reset_queries()

        print()
        print(f&quot;ran function {func.__name__}&quot;)
        print(f&quot;-&quot; * 20)
        print(f&quot;number of queries: {int(sum(query_counts) / len(query_counts))}&quot;)
        print(f&quot;Time of execution: {float(format(min(avs), &#39;.5f&#39;))}s&quot;)
        print()
        return func(*args, **kwargs)

    return wrapper
</code></pre>

]]></content>
  </entry>
  
  <entry>
    <title type="html"><![CDATA[aliyun 添加磁盘]]></title>
    <link href="http://blog.pengjunjie.com/15831374958414.html"/>
    <updated>2020-03-02T16:24:55+08:00</updated>
    <id>http://blog.pengjunjie.com/15831374958414.html</id>
    <content type="html"><![CDATA[
<p>aliyun的ubuntu 16/18使用的是自己挂在物理磁盘，而不是逻辑分区。这种方法如果安装完成之后想要扩展根目录(/)，只能够使用磁盘扩容，而不要使用新买一张盘。</p>

<h2 id="toc_0">磁盘扩容之后对根目录扩容</h2>

<p>使用磁盘扩容之后可以使用工具对根目录进行扩容。</p>

<h2 id="toc_1">添加一块硬盘</h2>

<p>新添加一块硬盘，并挂在到服务器上只能将硬盘挂在到某个目录下使用</p>

<pre><code class="language-bash"># 首先使用 fdisk -l 查看磁盘的情况
$ fdisk -l

# 然后新建一块磁盘
$ fdisk /dev/sdb 
# 一次按 n 创建新磁盘、 p 使用主分区 磁盘大小等可以保持默认，最后使用w保存退出

# 格式化磁盘
$ mkfs.ext4 /dev/sdb1

# 挂载
# 只能挂在到某个目录
$ mount /dev/sdb1 /data
</code></pre>

<p>同时重装之后新增的硬盘是不会变动的，只需要重新挂载一遍就可以了。</p>

<p>所以扩容和挂载还是在不同的使用场景下有很大区别的，可以用好这两种方式。</p>

]]></content>
  </entry>
  
  <entry>
    <title type="html"><![CDATA[Ubuntu 18 解决out of memory 问题]]></title>
    <link href="http://blog.pengjunjie.com/15830319130168.html"/>
    <updated>2020-03-01T11:05:13+08:00</updated>
    <id>http://blog.pengjunjie.com/15830319130168.html</id>
    <content type="html"><![CDATA[
<p>报错信息：</p>

<p>程序报错：</p>

<pre><code class="language-bash">#程序报错
MemoryError: Unable to allocate 22.4 GiB for an array with shape (54773, 54773) and data type float64

#写入系统日志错误
$ egrep -i &#39;killed process&#39; /var/log/syslog

Feb 29 23:55:12 iZbp1dfqh2kwqx54njldloZ kernel: [276605.773003] Killed process 9136 (python) total-vm:8352516kB, anon-rss:3838288kB, file-rss:4kB, shmem-rss:0kB
</code></pre>

<p>出现原因</p>

<p>使用<code>cosine_similarity(count_matrix, count_matrix)</code>来计算相似性，此时的count_matrix在54773大小，需要组成一个54773 * 54773 * float64大小的向量，需要的内存空间为22.4GB。</p>

<p>但是阿里云购买的服务器只有4v4G，一共的运存只有4G，会造成out of memory溢出。</p>

<p>溢出之后Linux的OOM killer(Out-Of-Memory killer) 会自动的将溢出的进程杀死，所以会直接kill掉该python进行，无法继续执行。</p>

<h3 id="toc_0">解决步骤1：添加虚拟内存</h3>

<p>内存不足的问题，最好的办法是直接升级服务器配置，升为32G的内存的服务器，但是这样所需要的钱还是不少的，特别是按年购买的服务器，没法临时升级。想到最好的方法便是提升虚拟内存，使用硬盘来协助计算。(在需要实时性的环境上还是尽量升级内存)</p>

<h4 id="toc_1">开始</h4>

<p>我这里虚拟了 30G 的容量进行内存扩容（主要是磁盘也不便宜啊），然后 swap 使用的利用率比例为 60，即：当物理内存剩下 60% 时使用 swap 进行交换。 </p>

<h4 id="toc_2">临时配置</h4>

<p>临时配置是指重启之后会失效，仅仅只是保持本次开机起作用。</p>

<p>分配文件空间, 建立一个 30G 的 swap 所需的文件空间</p>

<pre><code class="language-bash">dd if=/dev/zero of=/var/blockd.swap bs=1M count=32768
</code></pre>

<p>文件 Swap 格式化</p>

<pre><code class="language-bash">mkswap /var/blockd.swap
</code></pre>

<p>Swap 激活</p>

<pre><code class="language-text">swapon /var/blockd.swap
</code></pre>

<p>Swap 挂载</p>

<p>打开 /etc/fstab 文件编辑追加以下内容</p>

<pre><code class="language-bash">/var/blockd.swap swap swap default 0 0 
</code></pre>

<p>修改 Swap 利用率</p>

<pre><code class="language-bash">sysctl vm.swappiness=60
</code></pre>

<p>挂载生效</p>

<pre><code class="language-bash">mount -a
</code></pre>

<h4 id="toc_3">永久配置</h4>

<p>永久配置是指重启之后依然保持生效。</p>

<p>分配文件空间<br/>
建立一个 30G 的 swap 所需的文件空间</p>

<pre><code class="language-bash">dd if=/dev/zero of=/var/blockd.swap bs=1M count=2048
</code></pre>

<p>文件 Swap 格式化</p>

<pre><code class="language-bash">mkswap /var/blockd.swap
</code></pre>

<p>Swap 设置自激活</p>

<p>由于 /etc/rc.local 文件会优先于 /etc/fstab 执行，所以在文件 /etc/rc.local 里面增加下面一行命令</p>

<pre><code class="language-bash">swapon /var/blockd.swap
</code></pre>

<p>Swap 挂载<br/>
打开 /etc/fstab 文件编辑追加以下内容</p>

<pre><code class="language-bash">/var/blockd.swap swap swap default 0 0 
</code></pre>

<p>修改 Swap 利用率<br/>
编辑 /etc/sysctl.conf 实现永久生效</p>

<pre><code class="language-bash">vm.swappiness=60
</code></pre>

<p>重启生效</p>

<h4 id="toc_4">更多命令</h4>

<p>Swap 查看</p>

<pre><code class="language-bash">swapon -s
</code></pre>

<p>Swap 关闭</p>

<pre><code class="language-bash">swapoff /var/blockd.swap
</code></pre>

<p>查看 Swap 利用率</p>

<pre><code class="language-bash">cat /proc/sys/vm/swappiness
</code></pre>

<p>参数解释</p>

<pre><code class="language-bash">vm.swappiness
</code></pre>

<p>这个参数主要用来表示物理内存还剩多大比例才开始使用内存交换，本文中设置的值为 60 即当物理内存还剩 60% 时开始进行内存交换；这里有一篇英文相关解释：<a href="https://askubuntu.com/questions/969065/why-is-swap-being-used-when-vm-swappiness-is-0">https://askubuntu.com/questions/969065/why-is-swap-being-used-when-vm-swappiness-is-0</a></p>

<p>最后<br/>
关于为什么阿里云的 ECS 关闭了 Swap ，网上很多观点均是因为阿里云为了保护磁盘而默认进行了关闭（其实交换空间频繁读写实际就是对硬盘的操作），反正我们实现我们想要的就可以了，至于损耗嘛就是官方需要考虑的问题了；关于性能的话根据阿里云的磁盘读写速度文档表明 高效云盘 能够达到 130m/s 的读写速度，比老式机械 70m/s 高了不少，凑合着用吧，如果不满于高效云盘的可以考虑 SSD 那这样的话价格也会不同，自己做一下价格对比吧！！！</p>

<h3 id="toc_5">解决步骤二：关闭OOM Killer</h3>

<p>由于是OOM killer，所以需要关闭OOM Killer 来保证程序不被杀死</p>

<pre><code class="language-bash">sysctl -w vm.overcommit_memory=2
</code></pre>

<p>固定：</p>

<p>修改<code>/etc/sysctl.conf</code>文件</p>

<p>添加一行</p>

<pre><code class="language-text">vm.overcommit_memory=2
</code></pre>

<p>注意一定要在扩展了虚拟内存之后再添加这个配置，否则的话，服务器会内存溢出周后hang机。</p>

<p>参考文章:</p>

<p><a href="https://blog.csdn.net/littlebrain4solving/article/details/88592157">阿里云 ECS Ubuntu 16.04 创建 Swap 分区</a></p>

<p><a href="https://pylixm.cc/posts/2018-11-28-Linux-oom-killer.html">记一次 Linux OOM-killer 分析过程</a></p>

]]></content>
  </entry>
  
  <entry>
    <title type="html"><![CDATA[SnippetsLab & github gist & Lepton]]></title>
    <link href="http://blog.pengjunjie.com/15673247465458.html"/>
    <updated>2019-09-01T15:59:06+08:00</updated>
    <id>http://blog.pengjunjie.com/15673247465458.html</id>
    <content type="html"><![CDATA[
<p>gist主要用来管理一些基本的代码片段，比起github上面的项目每次要提交全工程更加轻量和简单。很多时候我们的很多代码片段是可以复用的，这些实际上也跟抽象相关。特别是脚本语言，比如javascript或者python之类，很多时候很少的修改就可以解决其他的问题。</p>

<p>gist的优势</p>

<ul>
<li>每个Gist都是一个Git库，有版本历史，可以被fork或clone</li>
<li>Gist有两种：公开的和私有的，私有的不会在你的Gist主页显示，也无法用搜索引擎搜索到，但这个链接是人人都能访问的</li>
<li>Gist可以搜索、下载、嵌入到网页。其中嵌入网页的功能还是不错的</li>
<li>有很多时候我们只是想记录代码的一部分，没有必要把一堆的其他代码提交到网上去</li>
<li>可以用gist保存一个有历史记录的长期更新的列表清单(知识点、知识迭代等)</li>
<li>记录简短的想法或总结：有时候想总结一些技术或经验，或者有一些想法，由于内容比较短，还不足以发表博客，可以先记录下来</li>
</ul>

<p>使用SnippetsLab来管理Github Gist的好处</p>

<ul>
<li>SnippetsLab支持的代码高亮比一般的文本编辑器多很多</li>
<li>同步到gist之后，可以保证代码的同步</li>
</ul>

<p>gist的使用可以参考<br/>
<a href="https://www.cnblogs.com/thinkam/p/10922920.html">Gist使用经验</a></p>

<p><a href="https://observablehq.com/@yourwilliam">observablehq</a><br/>
可以用这个应用为gist写独立的网页，方便展示，同时很多javascript代码可以展示最后的结构，前端开发的福音。<br/>
如果是纯前端代码，做好之后可以使用这个来发布，不需要在发布一个新的网页了</p>

<p><a href="https://www.labnol.org/internet/github-gist-tutorial/28499/">gist使用英文原版网页</a></p>

<p><a href="https://github.com/hackjutsu/Lepton">gist和SnippetsLab相关的一个开源electron软件</a></p>

<p><a href="http://hackjutsu.com/Lepton/">Leptong官网</a></p>

<h2 id="toc_0">我的使用经验</h2>

<ul>
<li>使用SnippetsLab来管理代码片段，更专注的代码管理</li>
<li>主要用于管理javascript和python的代码片段</li>
<li>将经常要更新和使用的list来用snippets来管理，毕竟snippets里面的文件更少，文档模式更方便管理，同时发送到gist会更加方便。</li>
<li>Lepton是开源的Gist客户端，可以针对需要进行修改相应的代码</li>
<li></li>
</ul>

]]></content>
  </entry>
  
  <entry>
    <title type="html"><![CDATA[图片颜色画板抓取]]></title>
    <link href="http://blog.pengjunjie.com/15670140679180.html"/>
    <updated>2019-08-29T01:41:07+08:00</updated>
    <id>http://blog.pengjunjie.com/15670140679180.html</id>
    <content type="html"><![CDATA[
<p><a href="https://github.com/fengsp/color-thief-py">color-thief-py</a><br/>
分装的很好，可以直接安装使用，提供api非常方便</p>

<p><a href="https://github.com/99designs/colorific">colorfic</a><br/>
这个也不错啊</p>

<p><a href="https://github.com/awesome-davian/Text2Colors">Text2Colors</a><br/>
这个非常有意思，一定要研究一下<br/>
后面可以多研究一点这种类型的应用。集成到平台中去</p>

<p><a href="https://github.com/FabriceCastel/gvcci">gucci</a></p>

<p><a href="https://github.com/Dilan1020/PyColorPalette">PyColorPalette</a></p>

<p><a href="https://github.com/sergeyk/rayleigh">rayleigh</a><br/>
使用颜色搜图</p>

<p><a href="https://github.com/obskyr/colorgram.py">colorgram.py</a><br/>
可以取色<br/>
<img src="media/15670140679180/15670161894165.jpg" alt=""/></p>

<p><a href="https://github.com/ardila/paintingReorganize">paintingReorganize</a><br/>
Use PCA analysis to reorganize the pixels of a painting into a smooth color palette.<br/>
颜色的分析</p>

<p><a href="https://github.com/athoune/Palette">https://github.com/athoune/Palette</a></p>

<p><a href="https://github.com/fundevogel/we-love-colors">https://github.com/fundevogel/we-love-colors</a></p>

<p><a href="https://github.com/tody411/PaletteSelection">https://github.com/tody411/PaletteSelection</a></p>

<p><a href="https://github.com/Zsailer/yerkes">https://github.com/Zsailer/yerkes</a></p>

<p><a href="https://github.com/PJijin/Cover-Image-Generator">https://github.com/PJijin/Cover-Image-Generator</a><br/>
<img src="media/15670140679180/15673583756727.jpg" alt="" style="width:1280px;"/></p>

]]></content>
  </entry>
  
  <entry>
    <title type="html"><![CDATA[django 的 gulp集成]]></title>
    <link href="http://blog.pengjunjie.com/15670095534679.html"/>
    <updated>2019-08-29T00:25:53+08:00</updated>
    <id>http://blog.pengjunjie.com/15670095534679.html</id>
    <content type="html"><![CDATA[
<p>django 集成gulp task run来更方便的发布静态文件</p>

<h2 id="toc_0">基于Adminto3的基本的gulp使用</h2>

<p>首先是安装 gulp</p>

<pre><code class="language-bash">$ npm install gulp -g
</code></pre>

<p>然后运行到模板文件中，运行</p>

<pre><code class="language-bash">$ npm install
</code></pre>

<ul>
<li><code>gulp</code> - recompiles and minifies theme assets into <code>dist</code> directory and starts local server serving the theme.</li>
<li><code>gulp build</code> - recompiles and minifies theme assets into <code>dist</code> folder.</li>
</ul>

<h2 id="toc_1">迁移步骤</h2>

<ul>
<li>将src、package.json和gulpfile.js 拷贝到项目根路径</li>
<li>在Template中引入模板文件</li>
<li>修改gulpfile.js</li>
</ul>

<p>将输出路径改到static下面，使用dist来单独隔开</p>

<pre><code class="language-javascript">var folder = {
    src: &quot;src/&quot;, // source files
    dist: &quot;dist/&quot;, // build files
    dist_assets: &quot;collect_web/static/dist/assets/&quot; //build assets files 
};
</code></pre>

<p>删除掉HTML相关部分，使用django来管理HTML template，所以不在需要使用gulp来管理了</p>

<pre><code class="language-javascript">// copy html files from src folder to dist folder, also copy favicons
function html() {
    var out = folder.dist;

    return gulp
        .src([
            folder.src + &quot;html/*.html&quot;,
            folder.src + &quot;html/*.ico&quot;, // favicons
            folder.src + &quot;html/*.png&quot;
        ])
        .pipe(fileinclude({
            prefix: &#39;@@&#39;,
            basepath: &#39;@file&#39;,
            indent: true
        }))
        .pipe(gulp.dest(out));
}
</code></pre>

<p>同时删除下面的HTML调用部分</p>

<pre><code class="language-javascript">
function watchFiles() {
    gulp.watch(folder.src + &quot;html/**&quot;, gulp.series(html, reloadBrowserSync));
    gulp.watch(folder.src + &quot;assets/images/**/*&quot;, gulp.series(imageMin, reloadBrowserSync));
    gulp.watch(folder.src + &quot;assets/fonts/**/*&quot;, gulp.series(fonts, reloadBrowserSync));
    gulp.watch(folder.src + &quot;scss/**/*&quot;, gulp.series(css, reloadBrowserSync));
    gulp.watch(folder.src + &quot;js/**/*&quot;, gulp.series(javascript, reloadBrowserSync));
}


// default task
gulp.task(
    &quot;default&quot;,
    gulp.series(
        copyAssets,
        html,
        imageMin,
        fonts,
        css,
        javascript,
        &#39;watch&#39;
    ),
    function(done) {done();}
);
</code></pre>

<ul>
<li>使用npm install 安装</li>
<li>开发的时候启动gulp即可，这样在修改的时候就可以自动更新的dist中</li>
<li>修改gitignore文件，不要把node_modules文件上传到Git中了</li>
<li>修改模板文件的static</li>
</ul>

<pre><code class="language-markup">
</code></pre>

]]></content>
  </entry>
  
  <entry>
    <title type="html"><![CDATA[瀑布流]]></title>
    <link href="http://blog.pengjunjie.com/15668426361771.html"/>
    <updated>2019-08-27T02:03:56+08:00</updated>
    <id>http://blog.pengjunjie.com/15668426361771.html</id>
    <content type="html"><![CDATA[
<h2 id="toc_0"><a href="https://github.com/myst729/Waterfall">Waterfall</a></h2>

<p>宽度自适应瀑布流<br/>
<a href="https://myst729.github.io/Waterfall/">https://myst729.github.io/Waterfall/</a><br/>
还可以，做成了异步加载</p>

<h2 id="toc_1"><a href="https://github.com/mqyqingfeng/waterfall">waterfall</a></h2>

<p>原生 JavaScript 实现的瀑布流效果，兼容到 IE8。</p>

<h2 id="toc_2"><a href="https://github.com/bh-lay/stick">Stick</a></h2>

<p>stick是什么 stick是一个响应式的瀑布流组件。</p>

<h2 id="toc_3"><a href="https://github.com/frank19900731/weibocard">weibocard</a></h2>

<h2 id="toc_4"><a href="https://github.com/adamwulf/Columnizer-jQuery-Plugin">Columnizer-jQuery-Plugin</a></h2>

<p>column layout</p>

<p>列式布局</p>

<p><img src="media/15668426361771/15668435630699.jpg" alt="" style="width:1280px;"/></p>

<h2 id="toc_5"><a href="https://github.com/ftlabs/ftcolumnflow">ftcolumnflow</a></h2>

<p>文字的流</p>

<p>查询关键字 column grid</p>

<h2 id="toc_6"><a href="https://github.com/suprb/Nested">一种比较神奇的排序算法</a></h2>

<p>可以研究研究的神奇的排序算法</p>

<p><a href="http://suprb.com/apps/nested/">http://suprb.com/apps/nested/</a></p>

<p>这个一定要研究一下</p>

<h2 id="toc_7"><a href="https://github.com/johansatge/elastic-columns">elastic-columns</a></h2>

<p>效果看上去不错，但是感觉实现比较复杂</p>

<h2 id="toc_8"><a href="https://github.com/mladenilic/columns.js">columns.js</a></h2>

<p>这个包需要好好研究一下</p>

<h2 id="toc_9"><a href="https://masonry.desandro.com/">masonry</a></h2>

<p>比较好用的包，代码也比较简单<br/>
比较推荐</p>

<h2 id="toc_10"><a href="https://github.com/Mystist/bootstrap-waterfall">bootstrap-waterfall</a></h2>

<p>Bootstrap的<br/>
比较推荐</p>

]]></content>
  </entry>
  
  <entry>
    <title type="html"><![CDATA[图片Editor分析 fabircjs 扩展包]]></title>
    <link href="http://blog.pengjunjie.com/15668363632056.html"/>
    <updated>2019-08-27T00:19:23+08:00</updated>
    <id>http://blog.pengjunjie.com/15668363632056.html</id>
    <content type="html"><![CDATA[
<h2 id="toc_0"><a href="https://github.com/kevoj/angular-editor-fabric-js">angular-editor-fabric-js</a></h2>

<p>非常好的使用fabric实现的angular带工具栏的内容</p>

<p><img src="media/15668363632056/15668365580448.jpg" alt=""/></p>

<h2 id="toc_1"><a href="https://github.com/michaeljcalkins/angular-fabric">angular-fabric</a></h2>

<p>这个也做的比较好，但是前段页面总是卡卡的，不知道是什么原因</p>

<h2 id="toc_2"><a href="https://github.com/seal789ie/react-fabricjs">react-fabricjs</a></h2>

<p>react版本，但是没有看到demo</p>

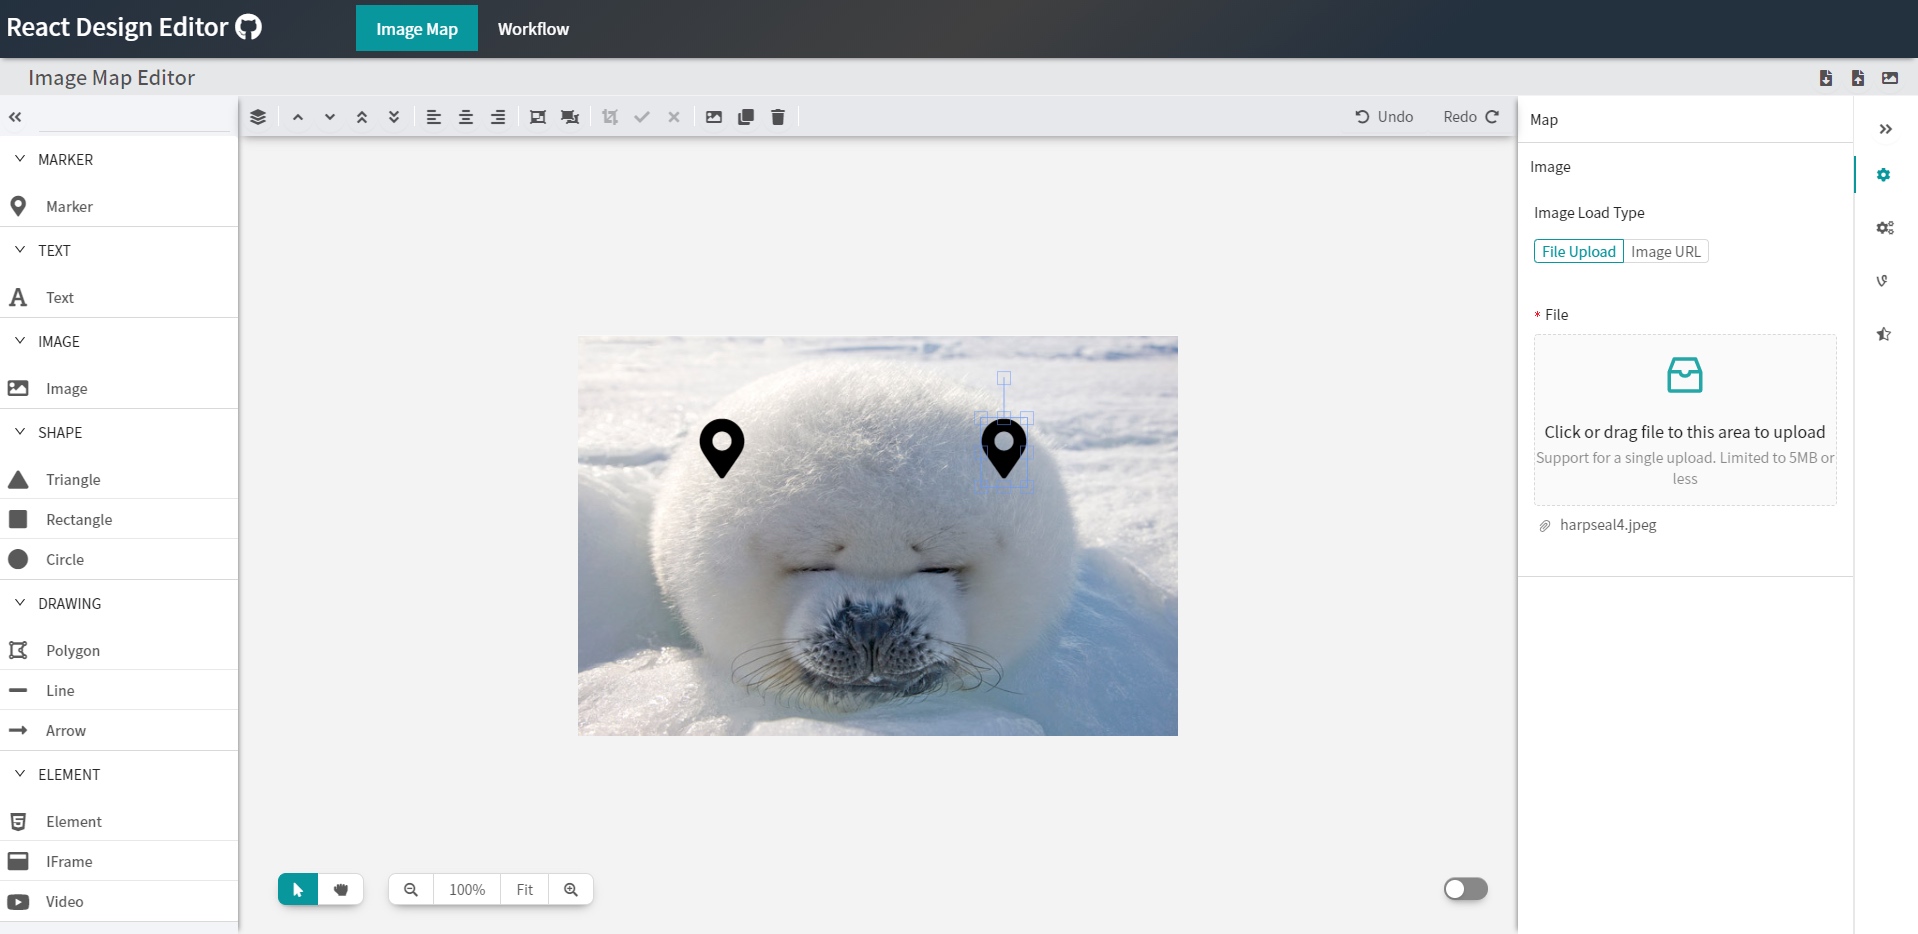
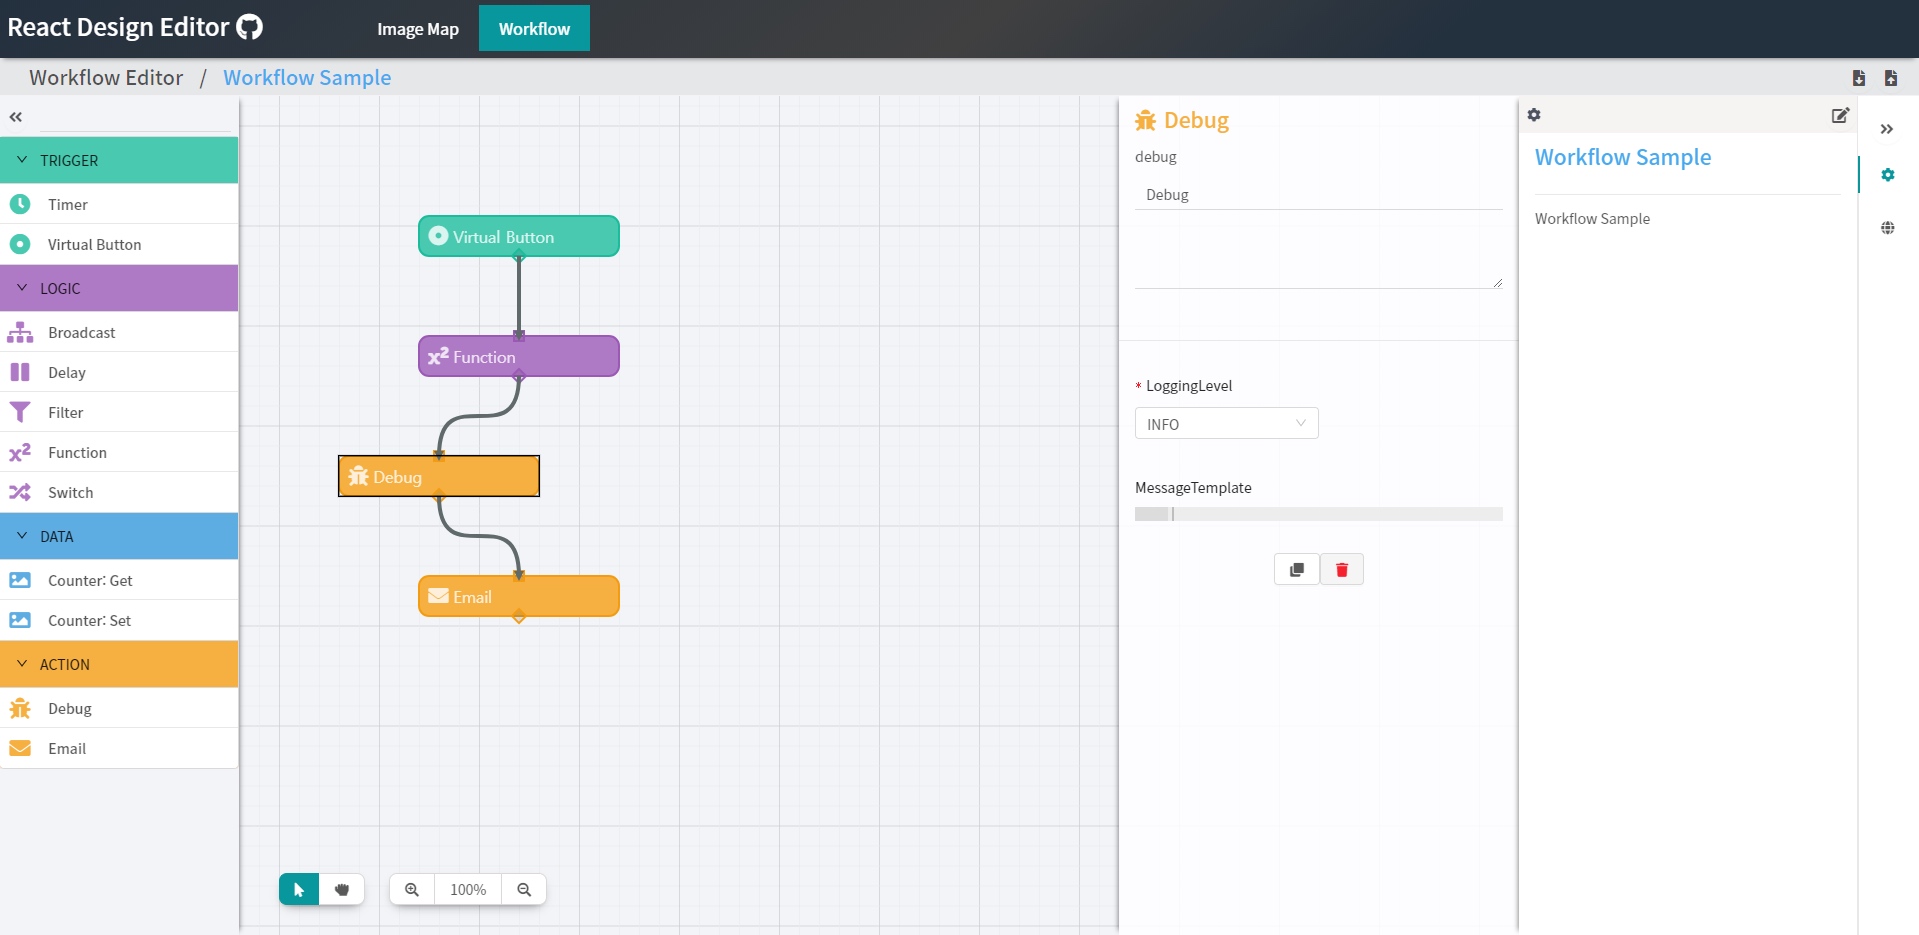
<h2 id="toc_3"><a href="https://github.com/salgum1114/react-design-editor">React Design Editor</a></h2>

<p>非常好的基于react的可拖拽花瓣框架</p>

<p><img src="media/15668363632056/15668372217076.jpg" alt=""/></p>

<p><img src="media/15668363632056/15668378970039.jpg" alt=""/></p>

<h2 id="toc_4"><a href="https://github.com/purestart/vue-fabric">vue-fabri</a></h2>

<p>vue版本的fabric，没有截图</p>

<h2 id="toc_5"><a href="https://github.com/Eamonnzhang/multi-draw">multi-draw</a></h2>

<p>☁️ 基于Fabric.js+Socket.io的多人在线实时同步画板</p>

<p>demo挂了，看不到，可以跑起来看看</p>

<h2 id="toc_6"><a href="https://github.com/sandor/floido-designer">floido-designer</a></h2>

<p>这个感觉非常靠谱。</p>

<p>还是用了electron，这样的好处是可以做成客户端了。体验会更好</p>

<p><img src="media/15668363632056/15668387791787.jpg" alt=""/></p>

<h2 id="toc_7"><a href="https://github.com/suguoyao/vue-card-diy">vue-card-diy</a></h2>

<p>手机版的自定义画板</p>

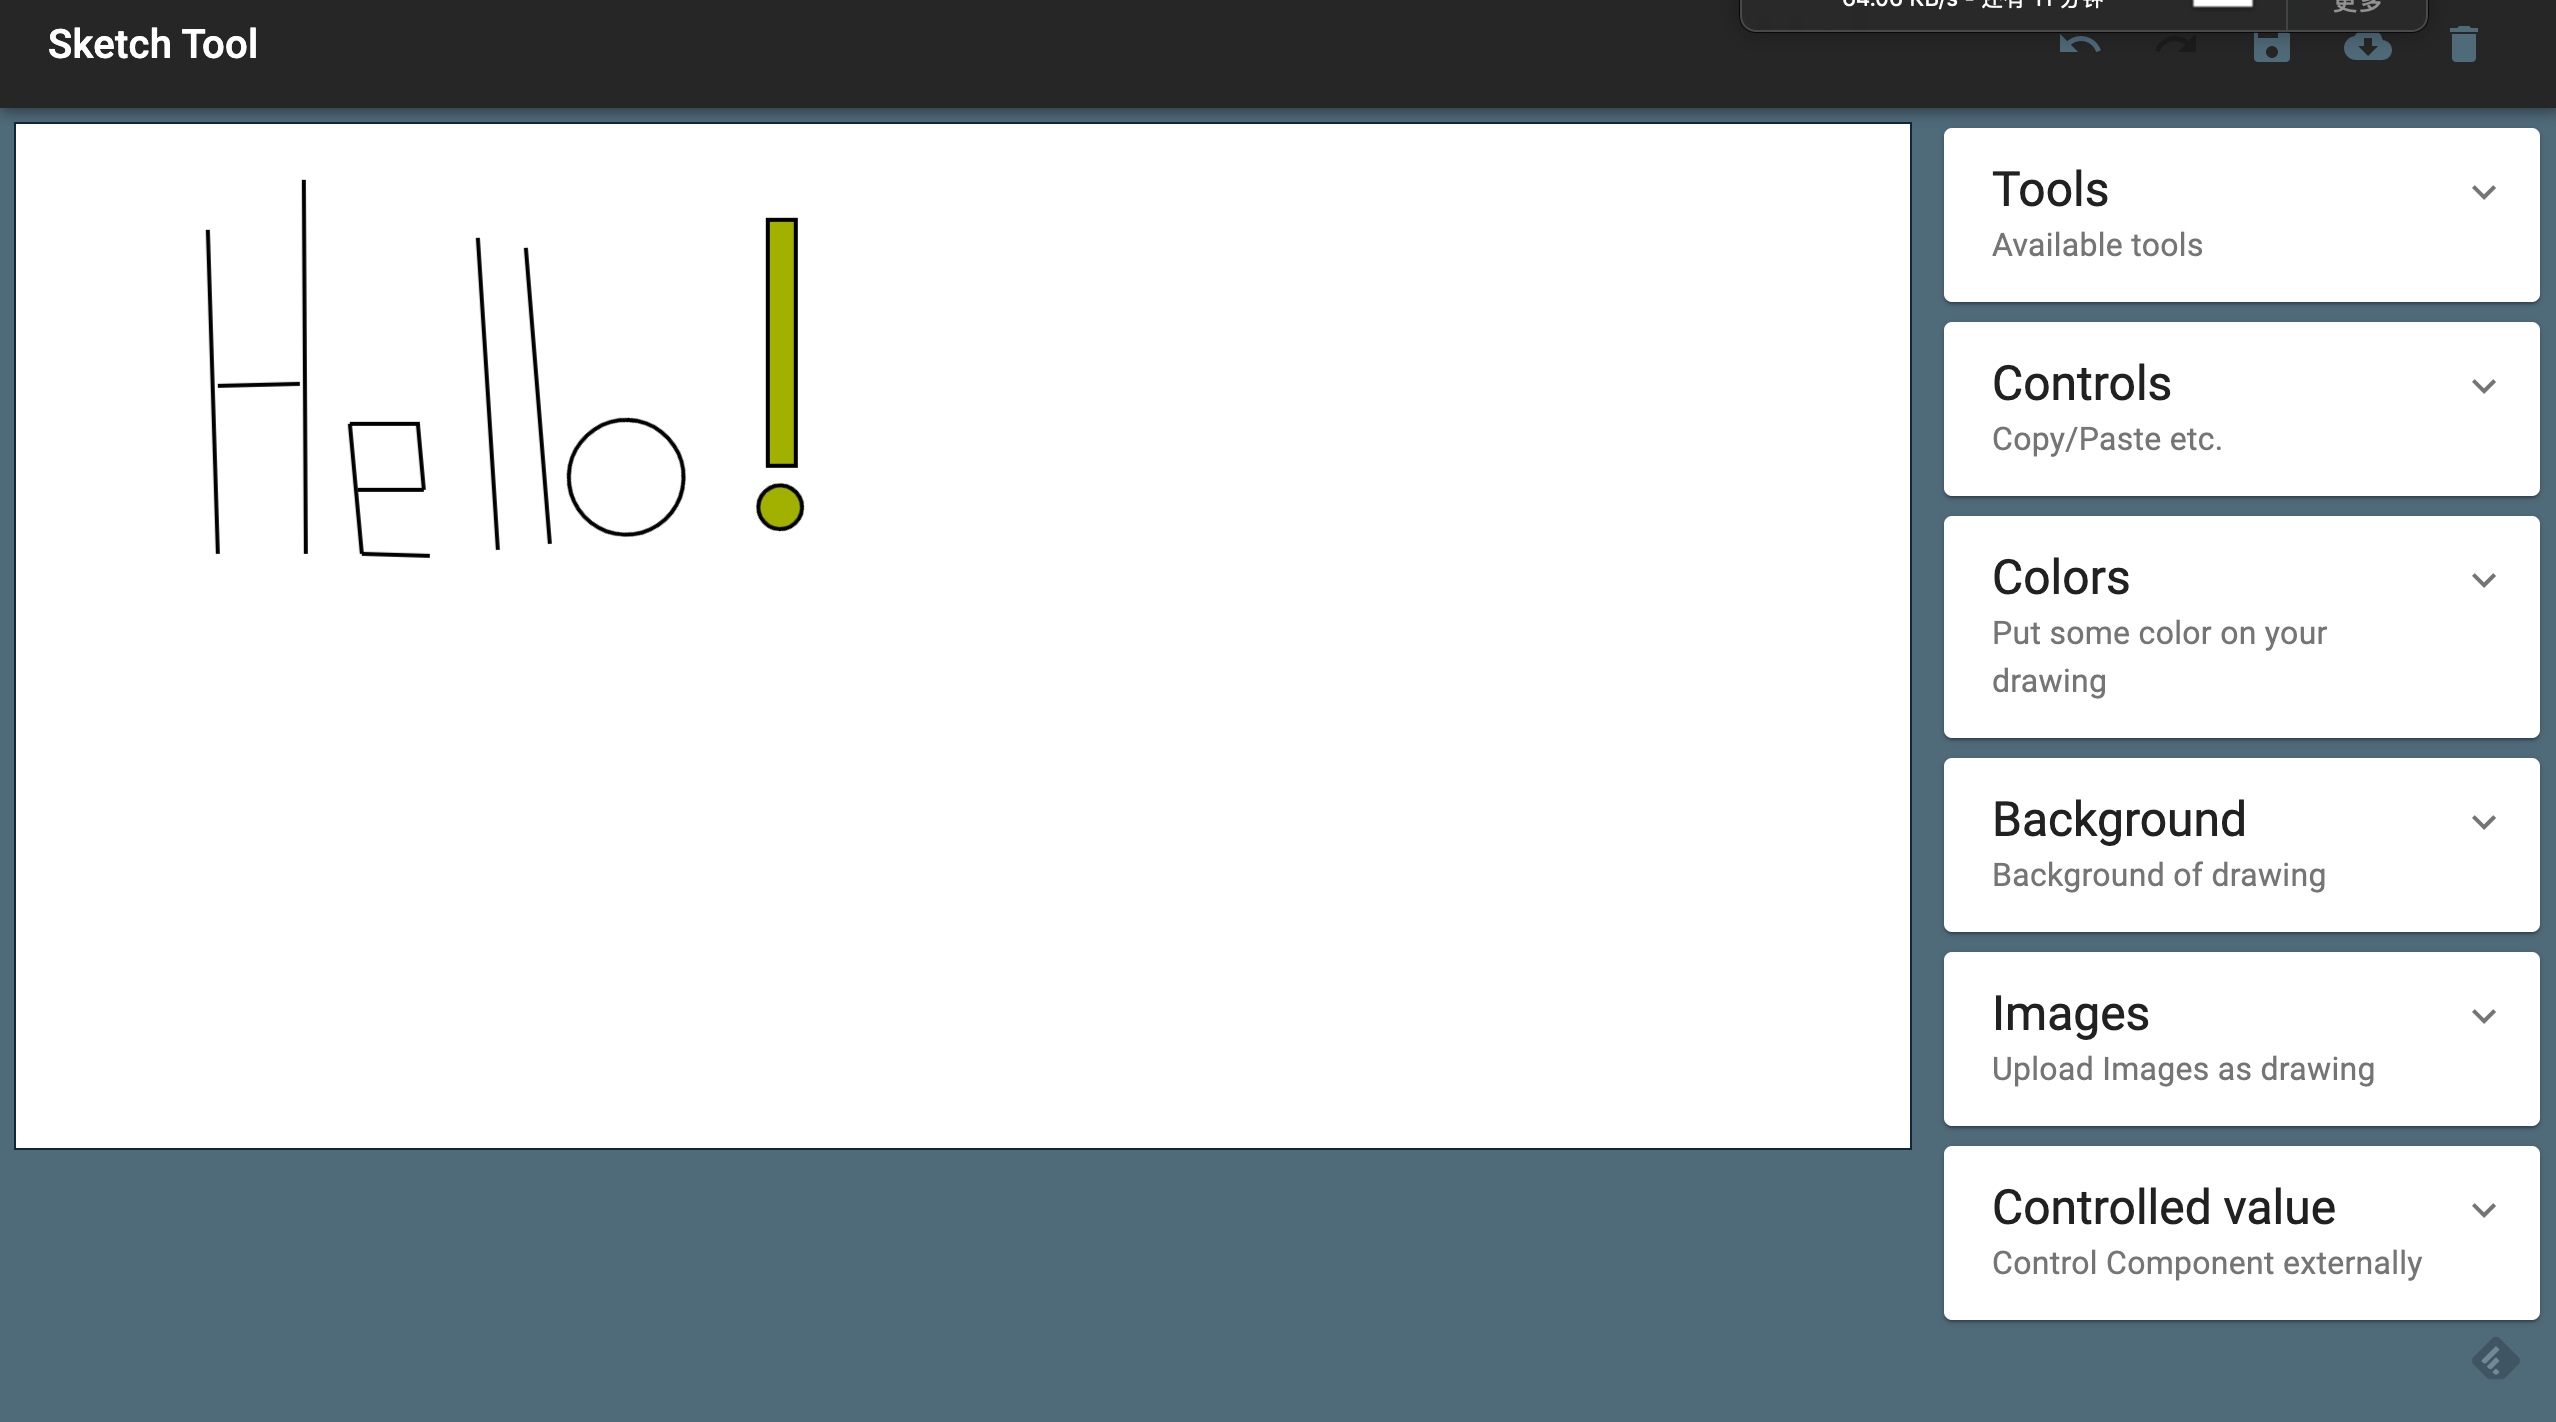
<h2 id="toc_8"><a href="https://github.com/tbolis/react-sketch">react-sketch</a></h2>

<p>样子做得一般般，但是可以使用了，用来学习是不错的选择</p>

<p><img src="media/15668363632056/15668390956213.jpg" alt="" style="width:1278px;"/></p>

<h2 id="toc_9"><a href="https://github.com/ange007/pie-js">pie-js</a></h2>

<p>还比较不错</p>

<p><img src="media/15668363632056/15668392639696.jpg" alt="" style="width:1280px;"/></p>

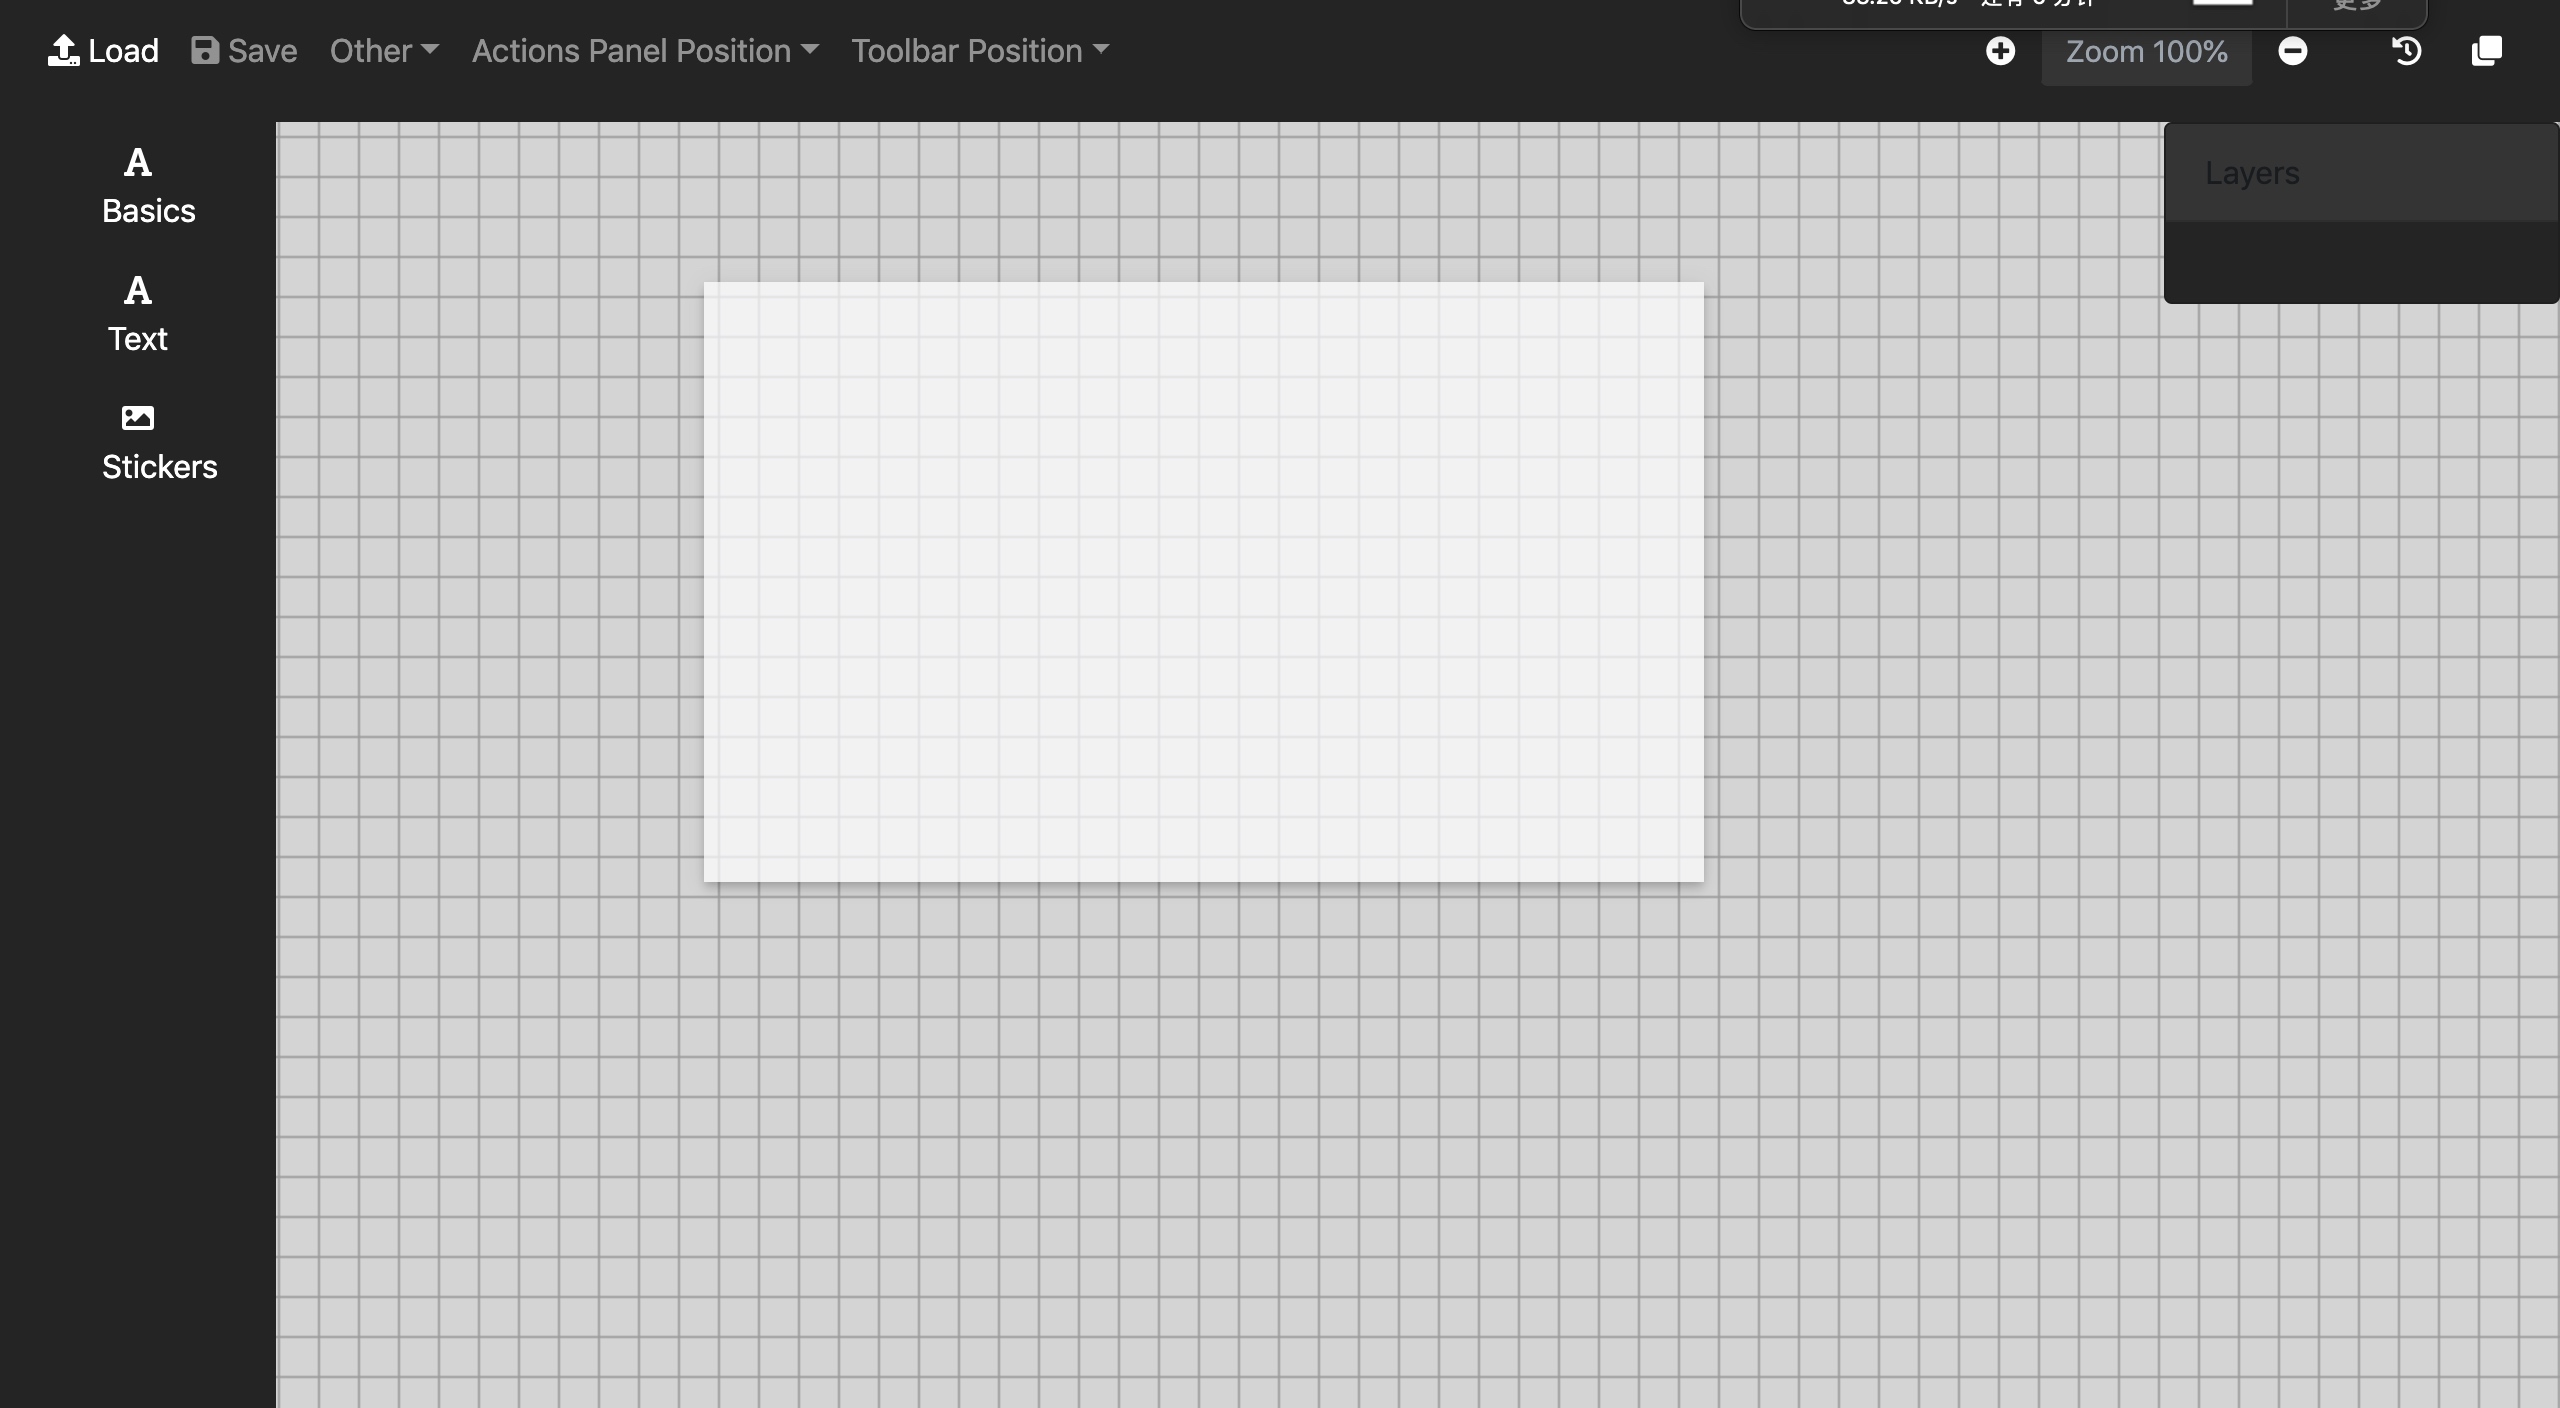
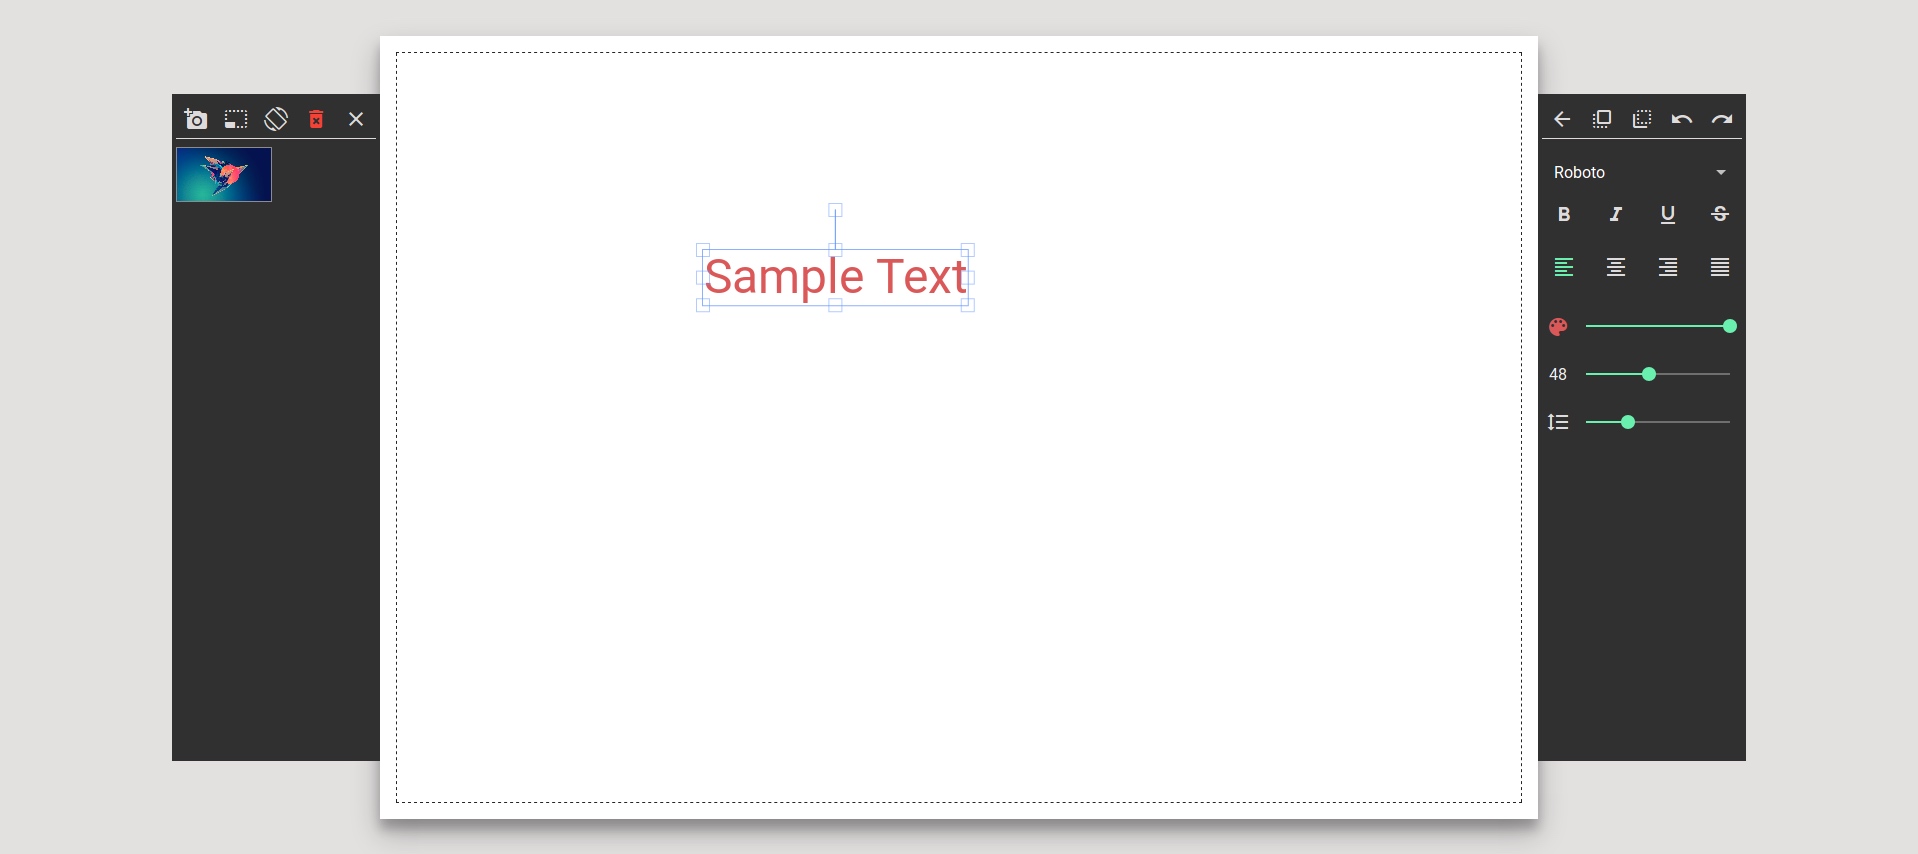
<h2 id="toc_10"><a href="https://github.com/Gulix/geckos">geckos</a></h2>

<p>An online Card Editor with Templates <a href="http://gulix.github.io/geckos/">http://gulix.github.io/geckos/</a></p>

<p>没运行起来，后面可以试试</p>

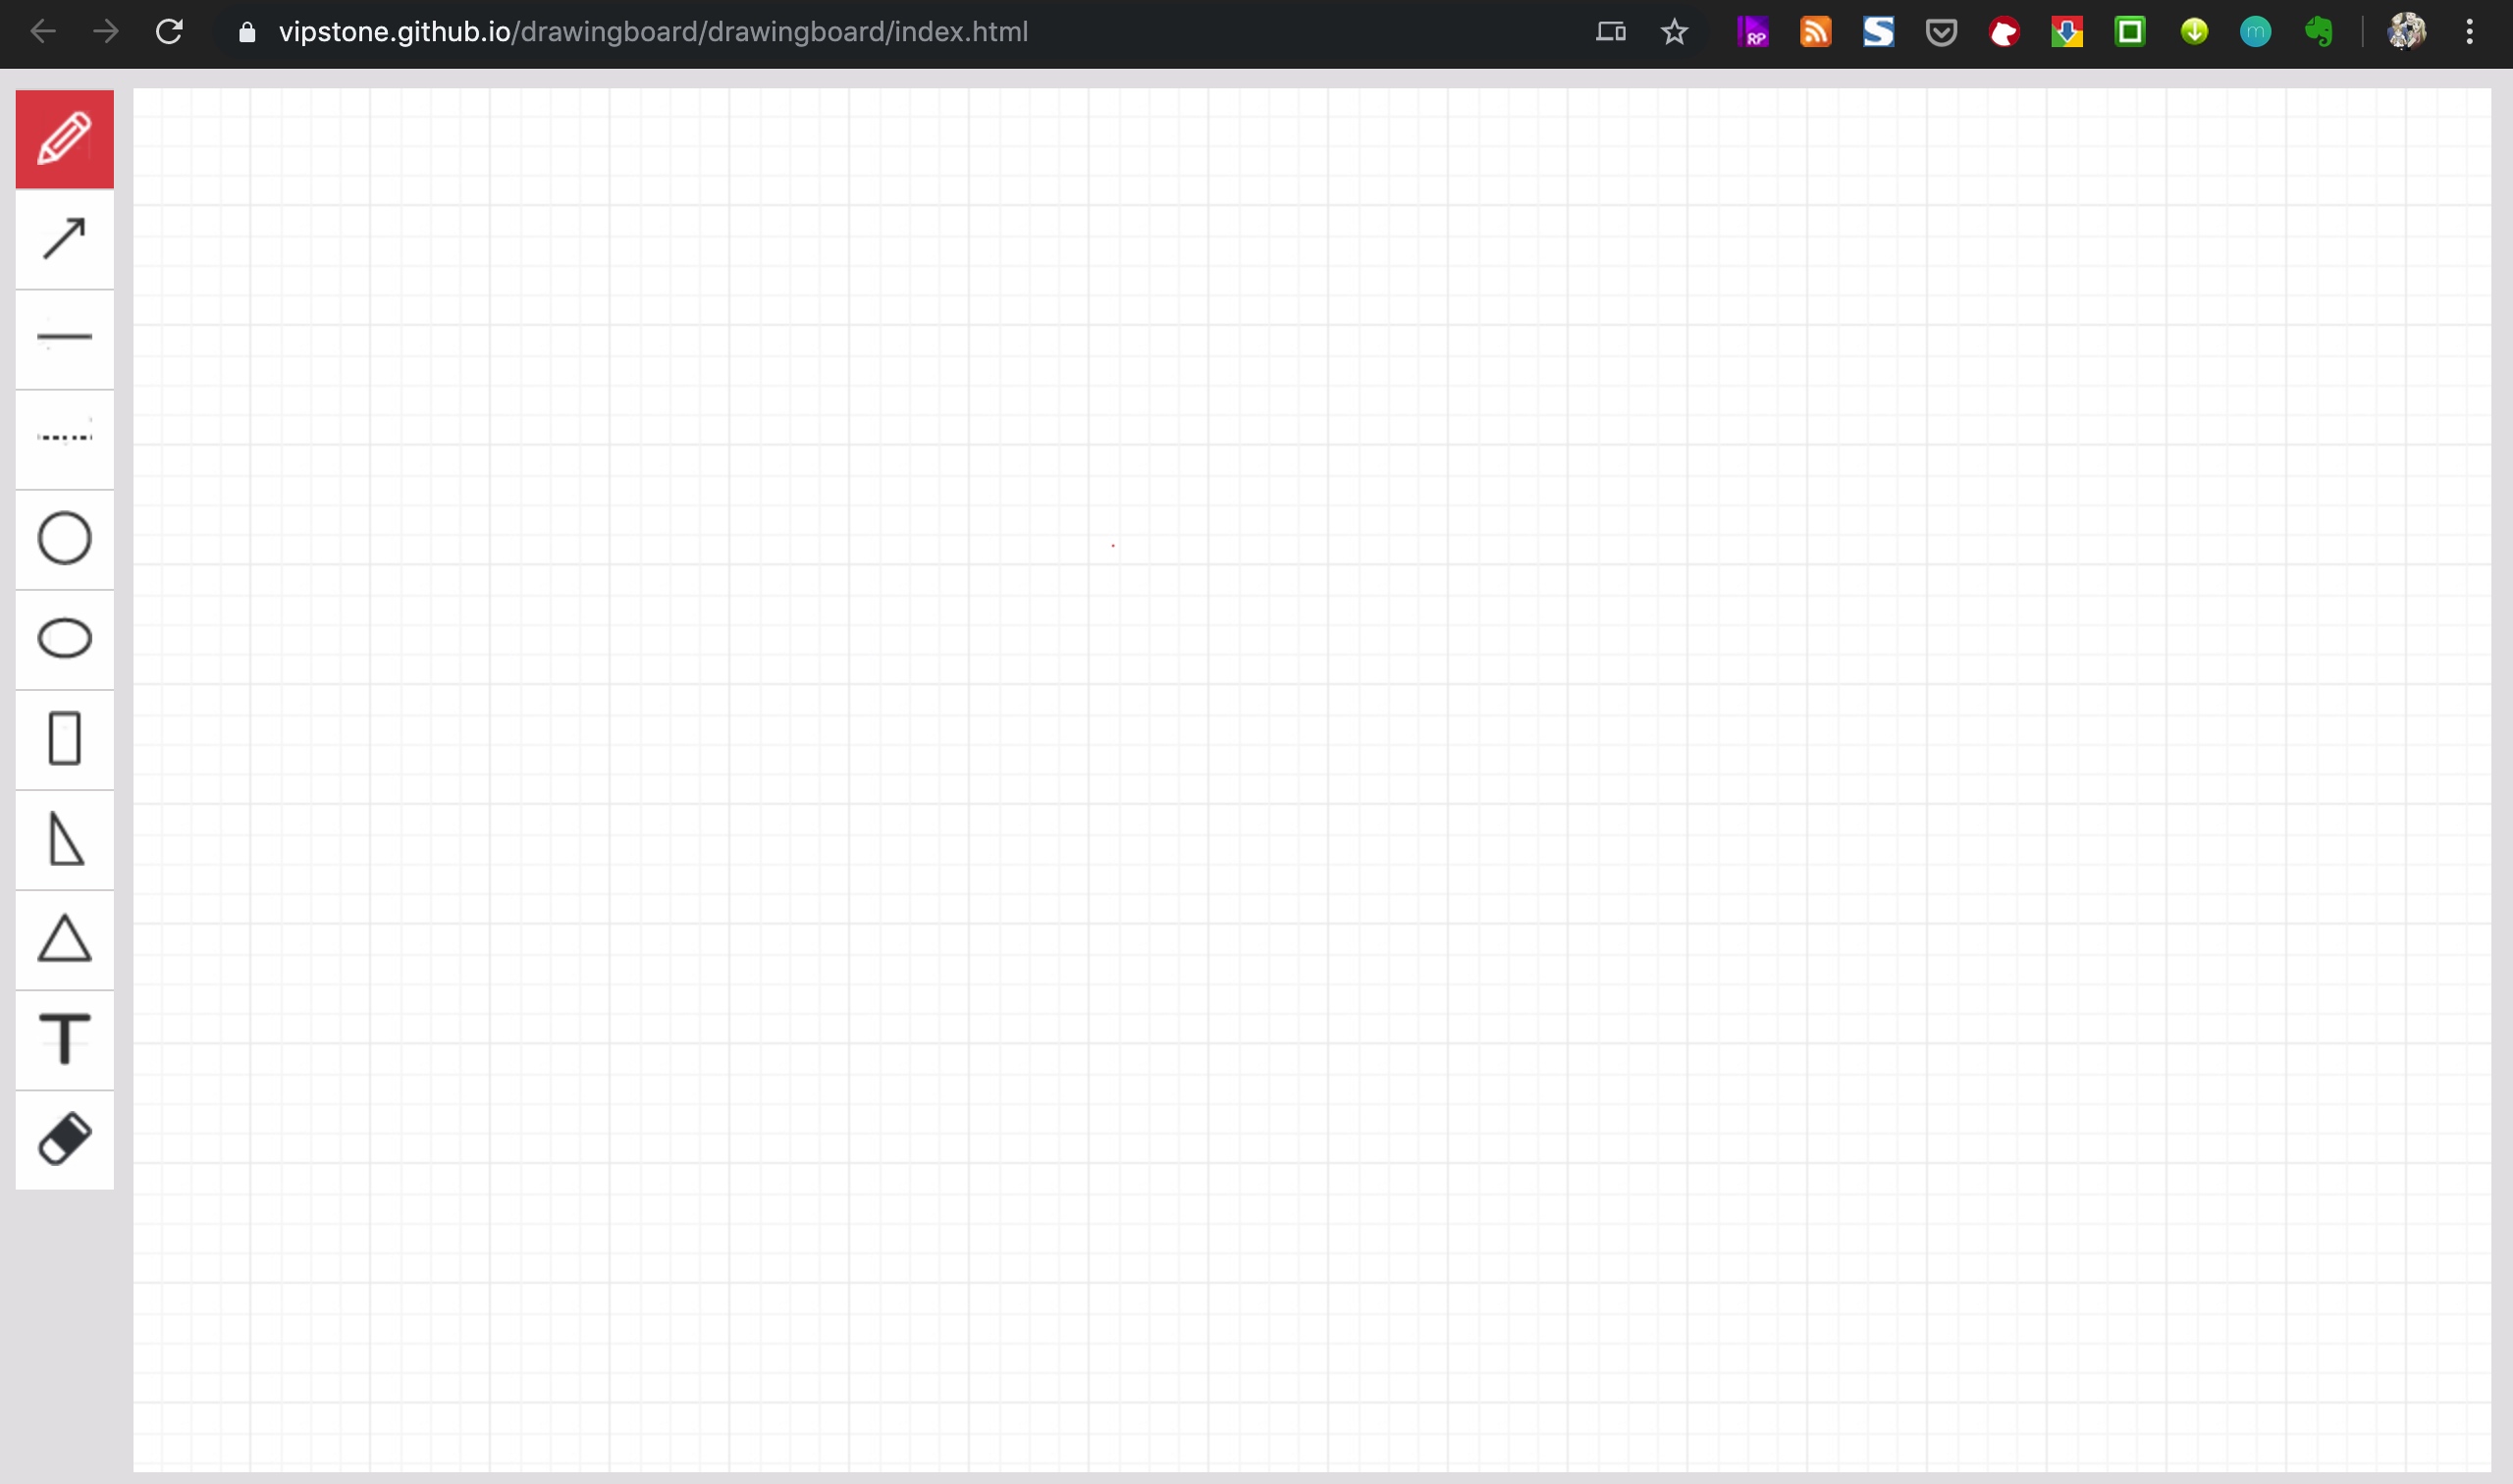
<h2 id="toc_11"><a href="https://github.com/vipstone/drawingboard">基于canvas的高级画板程序.</a></h2>

<p>全局绘制颜色选择<br/>
护眼模式、网格模式切换<br/>
自由绘制<br/>
画箭头<br/>
画直线<br/>
画虚线<br/>
画圆/椭圆/矩形/直角三角形/普通三角形/等边三角形<br/>
文字输入<br/>
图片展示及相关移动、缩放等操作<br/>
删除功能<br/>
支持画板同比缩放<br/>
支持图形即时显示</p>

<p><img src="media/15668363632056/15668401507587.jpg" alt="" style="width:1280px;"/></p>

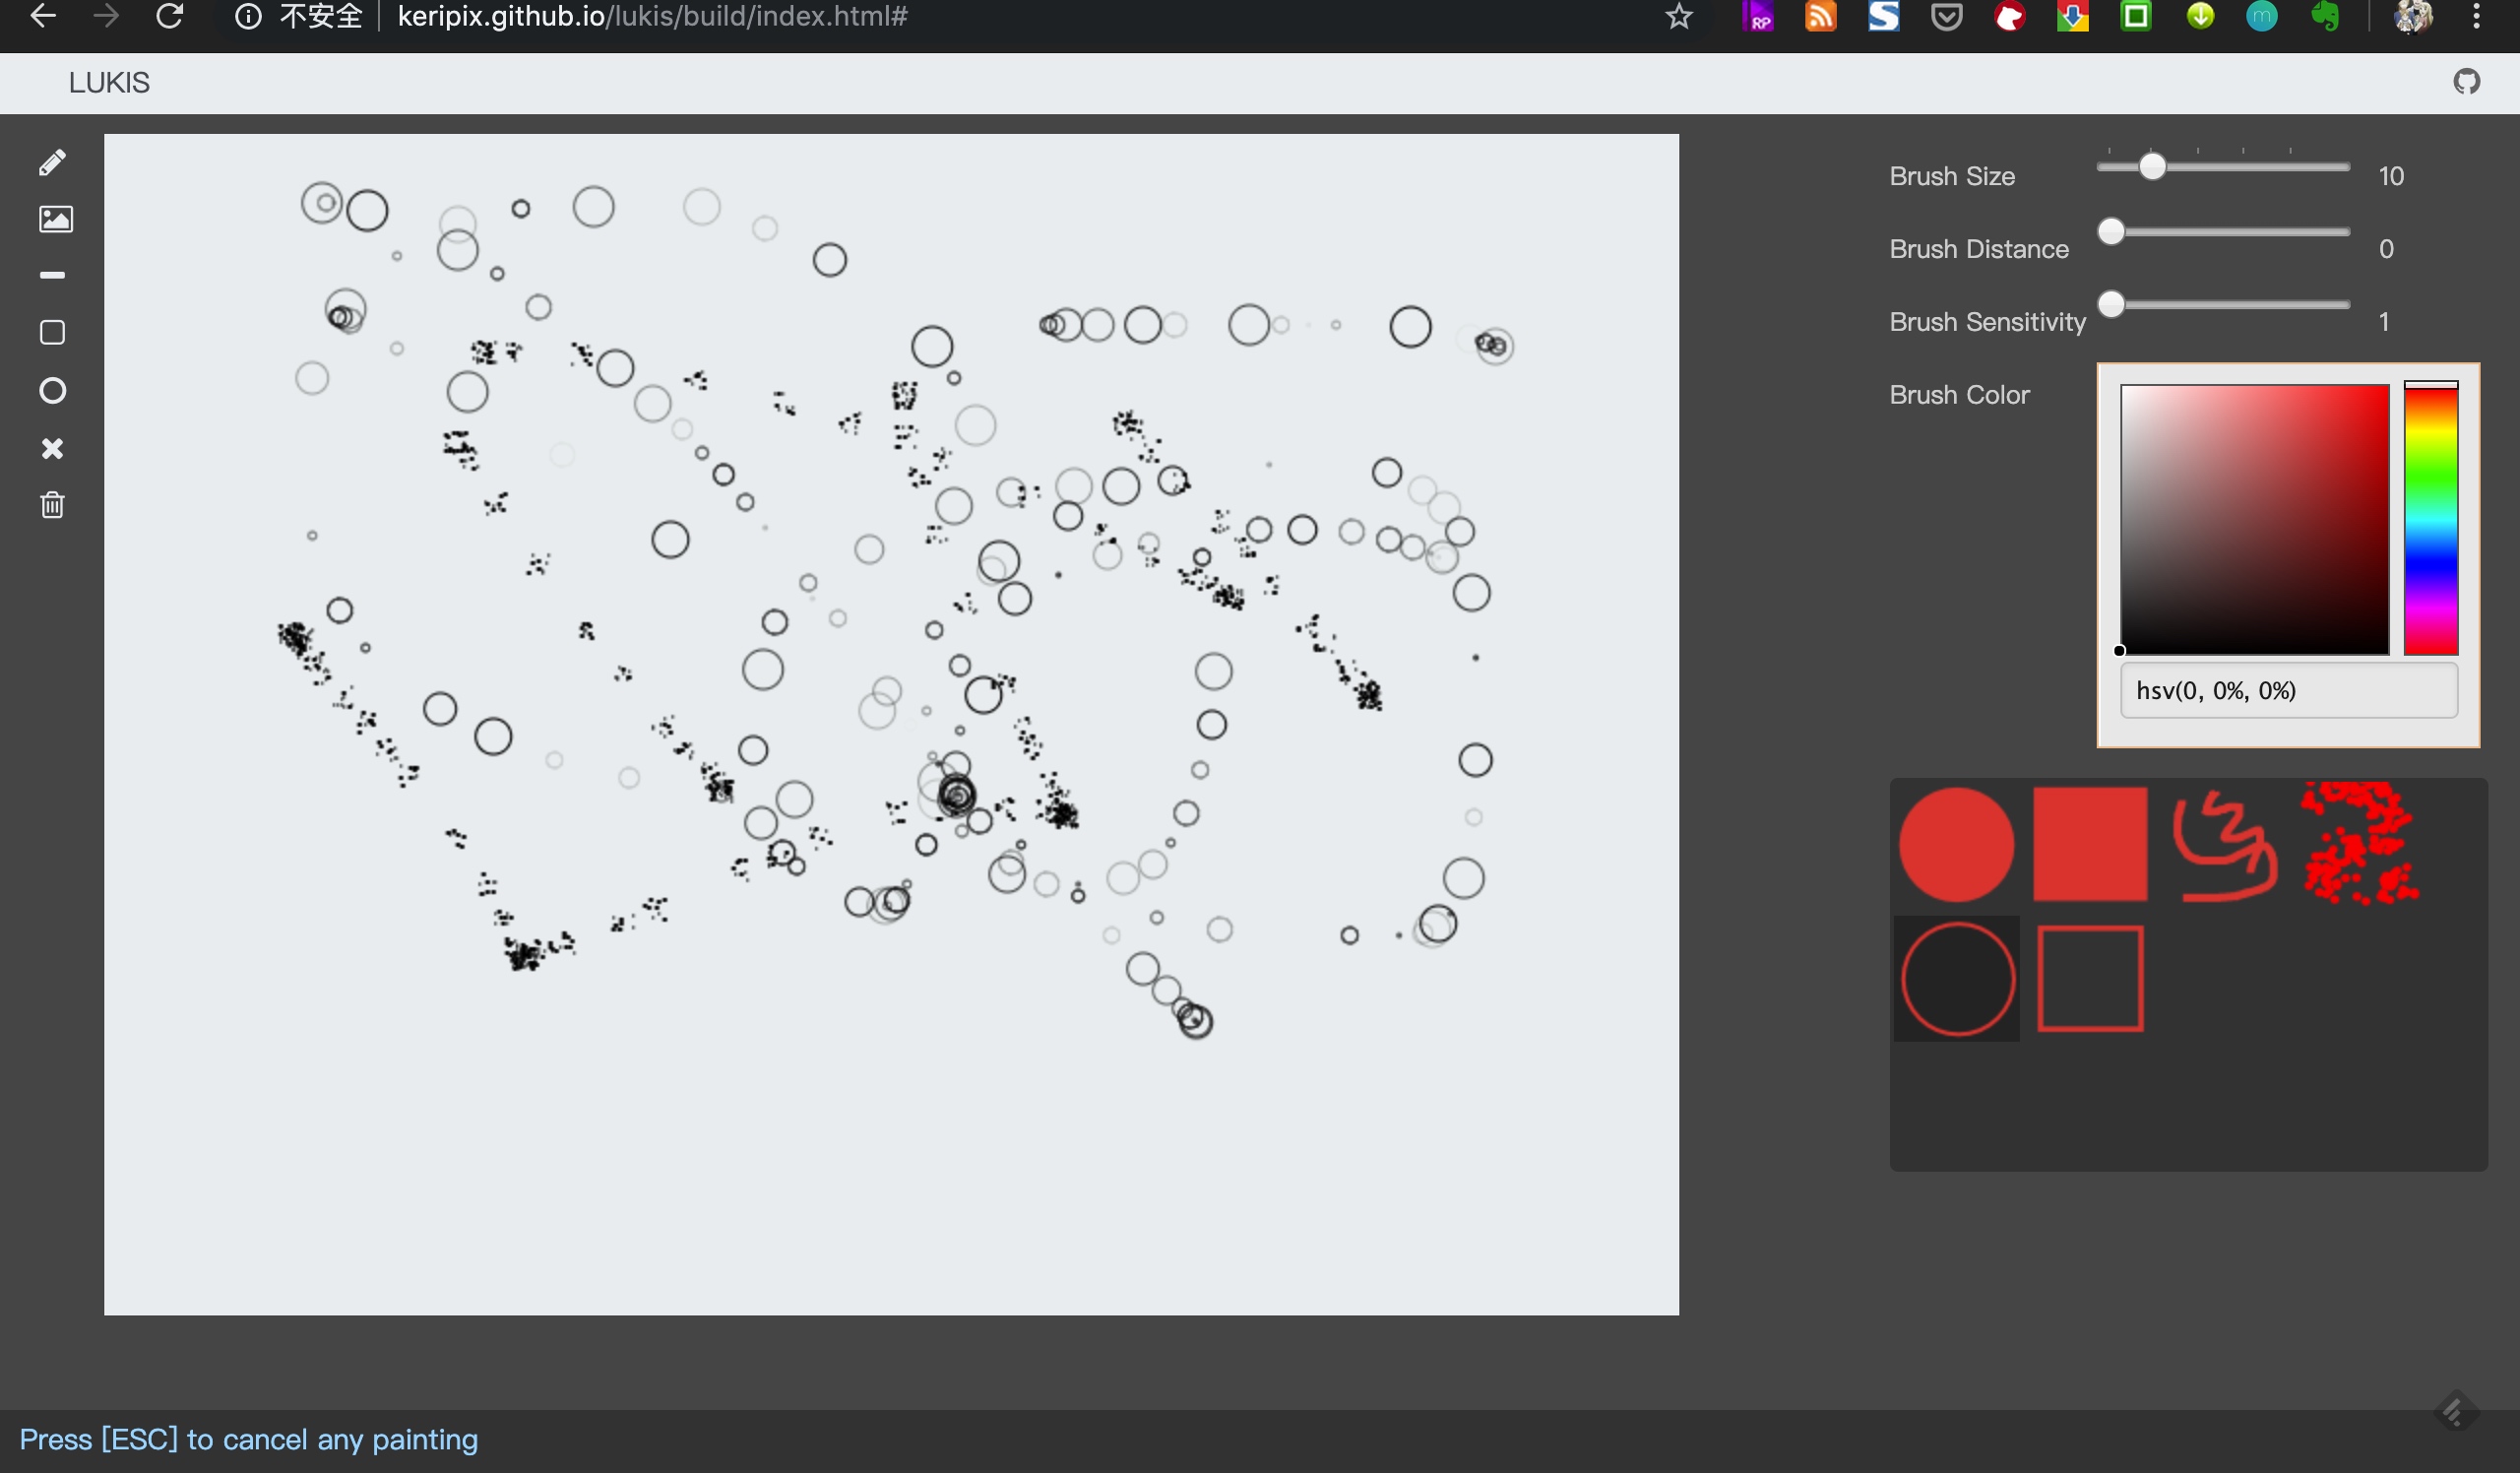
<h2 id="toc_12"><a href="https://github.com/keripix/lukis">lukis</a></h2>

<p><img src="media/15668363632056/15668405325562.jpg" alt="" style="width:1280px;"/></p>

<h2 id="toc_13"><a href="https://github.com/AakashMallik/photo-chrome">photo-chrome</a></h2>

<p>A state of the art web based photo editor module made using angular v4</p>

<p>值得好好研究研究的项目</p>

<p><img src="media/15668363632056/15668407200466.jpg" alt=""/></p>

<p><img src="media/15668363632056/15668408964168.jpg" alt=""/></p>

<h2 id="toc_14">[fabricjs-pathfinding](<a href="https://github.com/kevoj/fabricjs-pathfinding%EF%BC%89">https://github.com/kevoj/fabricjs-pathfinding）</a></h2>

<p>可视化的走迷宫，非常好的demo例子</p>

<h2 id="toc_15"><a href="https://github.com/Big-Silver/Angular-FabricJS-2d-Diagram">AngularJS &amp; FabricJS - 2D - Diagram</a></h2>

<p>A browser-based 2D diagram editor, built using AngularJS, AngularUI and Fabric.js. This project is built by [Big-Silver].</p>

<h2 id="toc_16"><a href="https://github.com/taqimustafa/react-redux-fabricjs">react-redux-fabricjs</a></h2>

<p>Fabric.js with React/Redux </p>

]]></content>
  </entry>
  
  <entry>
    <title type="html"><![CDATA[在线python editor]]></title>
    <link href="http://blog.pengjunjie.com/15668187060689.html"/>
    <updated>2019-08-26T19:25:06+08:00</updated>
    <id>http://blog.pengjunjie.com/15668187060689.html</id>
    <content type="html"><![CDATA[
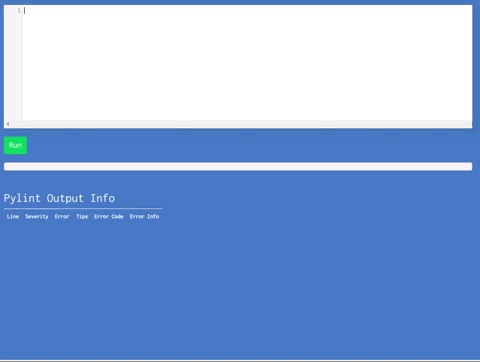
<p><a href="https://github.com/ethanchewy/PythonBuddy">https://github.com/ethanchewy/PythonBuddy</a></p>

<p>可以参考<br/>
<a href="http://pythonbuddy.com">http://pythonbuddy.com</a></p>

<p><img src="media/15668187060689/15668188229344.jpg" alt=""/></p>

<p>安装也比较简单</p>

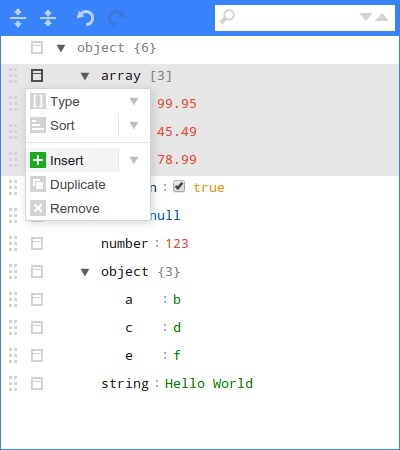
<h3 id="toc_0"><a href="https://github.com/nnseva/django-jsoneditor">django-jsoneditor</a></h3>

<p><img src="media/15668187060689/15668190074864.jpg" alt=""/></p>

]]></content>
  </entry>
  
  <entry>
    <title type="html"><![CDATA[图片Editor 分析]]></title>
    <link href="http://blog.pengjunjie.com/15668161054186.html"/>
    <updated>2019-08-26T18:41:45+08:00</updated>
    <id>http://blog.pengjunjie.com/15668161054186.html</id>
    <content type="html"><![CDATA[
<h3 id="toc_0"><a href="https://github.com/nhn/tui.image-editor">tui.image-editor</a></h3>

<p>Full-featured photo image editor using canvas</p>

<h3 id="toc_1"><a href="https://github.com/viliusle/miniPaint">mini画板</a></h3>

<p><img src="media/15668161054186/15668164367667.jpg" alt=""/></p>

<p>这个一直在更新，是可以使用的工具。使用npm和js进行管理</p>

<h3 id="toc_2"><a href="https://github.com/evanw/webgl-filter">WebGL Filter</a></h3>

<p><img src="media/15668161054186/15668166248851.jpg" alt=""/></p>

<p>python 和js写的</p>

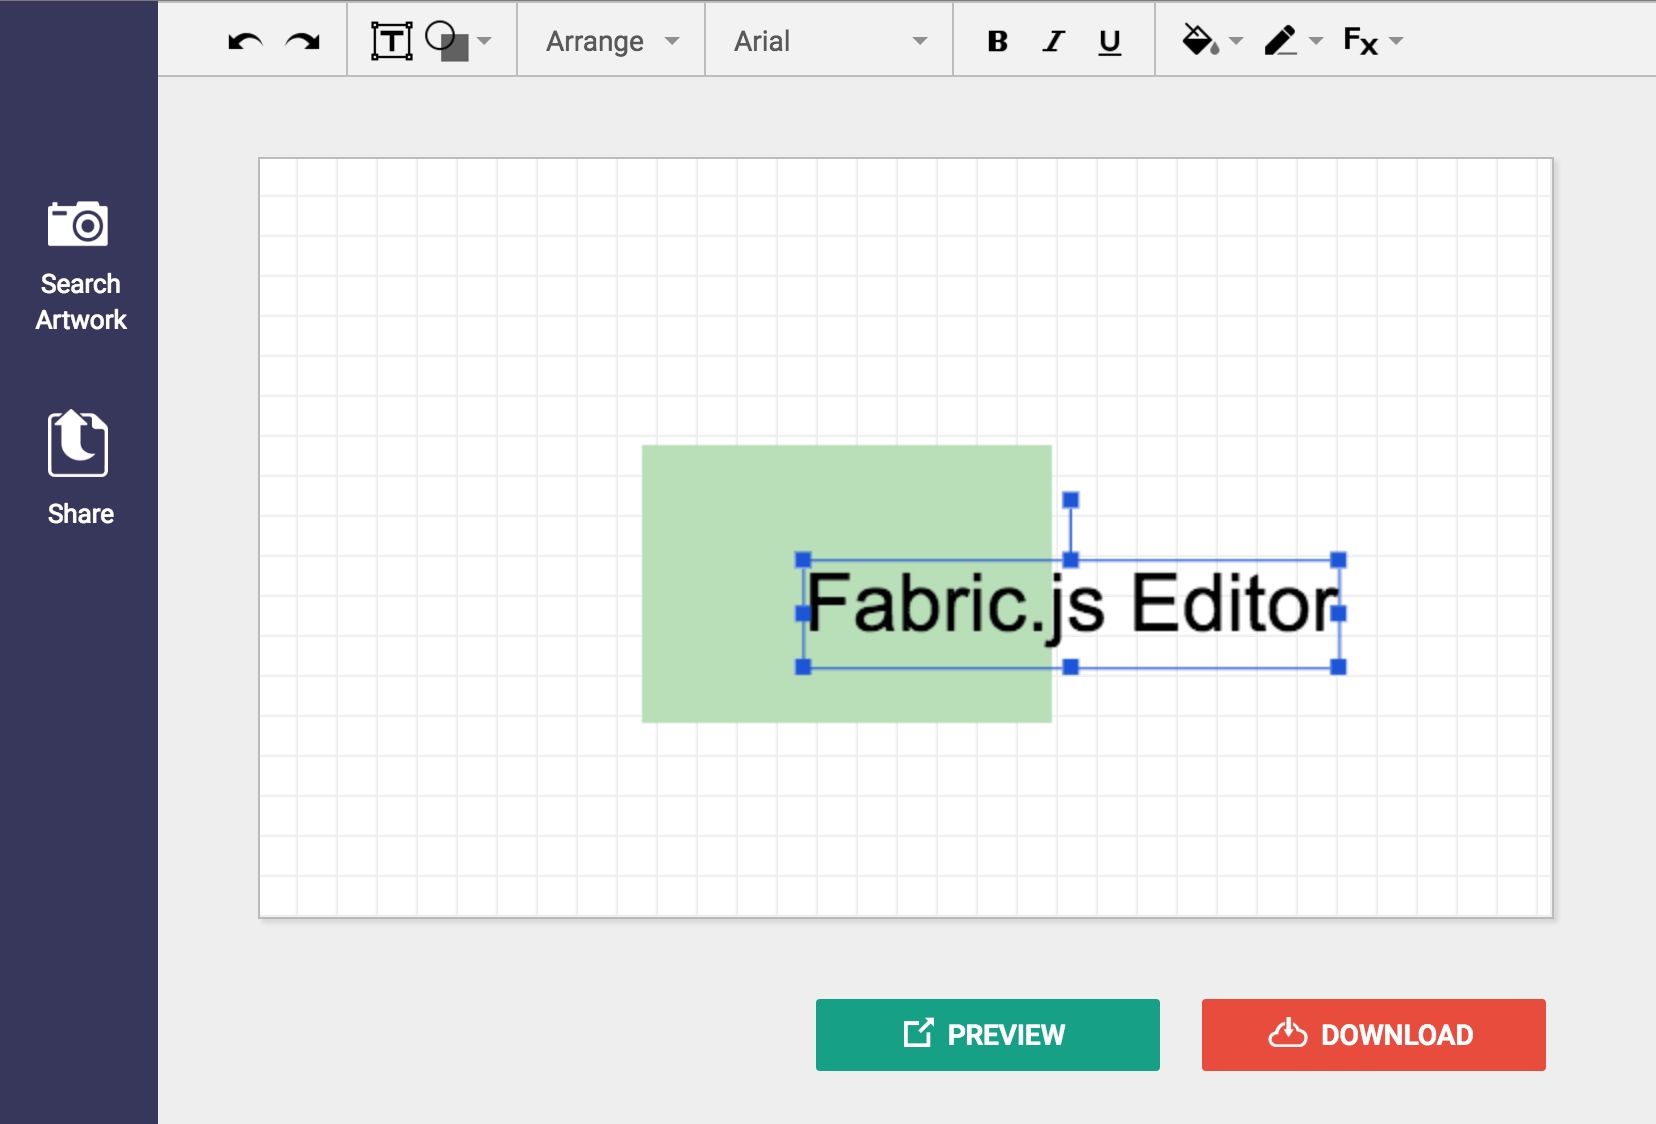
<h3 id="toc_3"><a href="https://github.com/danielktaylor/fabric-js-editor">fabric-js-editor</a></h3>

<p><img src="media/15668161054186/15668169629305.jpg" alt=""/></p>

<p>这个就是现在需要的针对图片和文字编辑的开源组件。他使用的是Fabric.js</p>

<h3 id="toc_4">Fabric.js</h3>

<p><a href="http://fabricjs.com/">Fabric.js</a></p>

<p>在这个网站上有很多针对网站的实现的内容，研究清楚这个可以直接进行编辑。</p>

<h3 id="toc_5"><a href="https://github.com/aurbano/nuophoto">https://github.com/aurbano/nuophoto</a></h3>

<p>这个实现的一般般</p>

<h3 id="toc_6">PlantUML Editor</h3>

<p><a href="https://github.com/kkeisuke/plantuml-editor">https://github.com/kkeisuke/plantuml-editor</a></p>

<p>基于vue的 online UML编辑器</p>

<h3 id="toc_7">文档editor</h3>

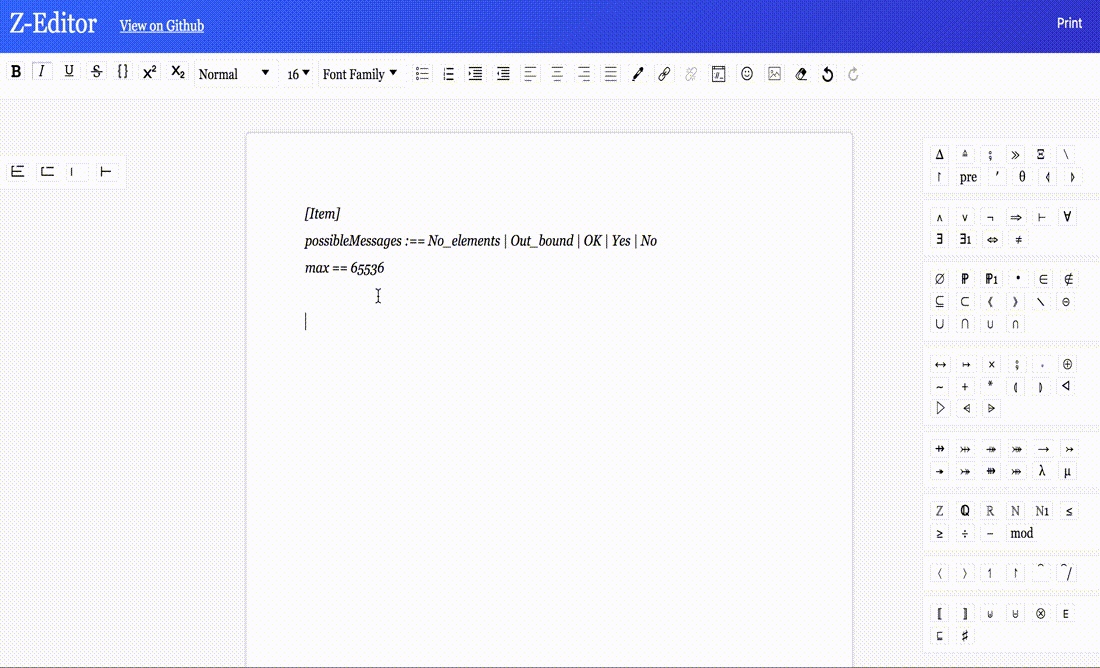
<p><a href="https://github.com/Z-Editor/Z-Editor">https://github.com/Z-Editor/Z-Editor</a><br/>
<a href="https://z-editor.github.io/">https://z-editor.github.io/</a><br/>
A tool to create, edit and print formal Z-notation documents.</p>

<p><img src="media/15668161054186/15668191240381.jpg" alt=""/></p>

<h3 id="toc_8">Method-Draw</h3>

<p><a href="https://github.com/akira-cn/Method-Draw">Method-Draw</a></p>

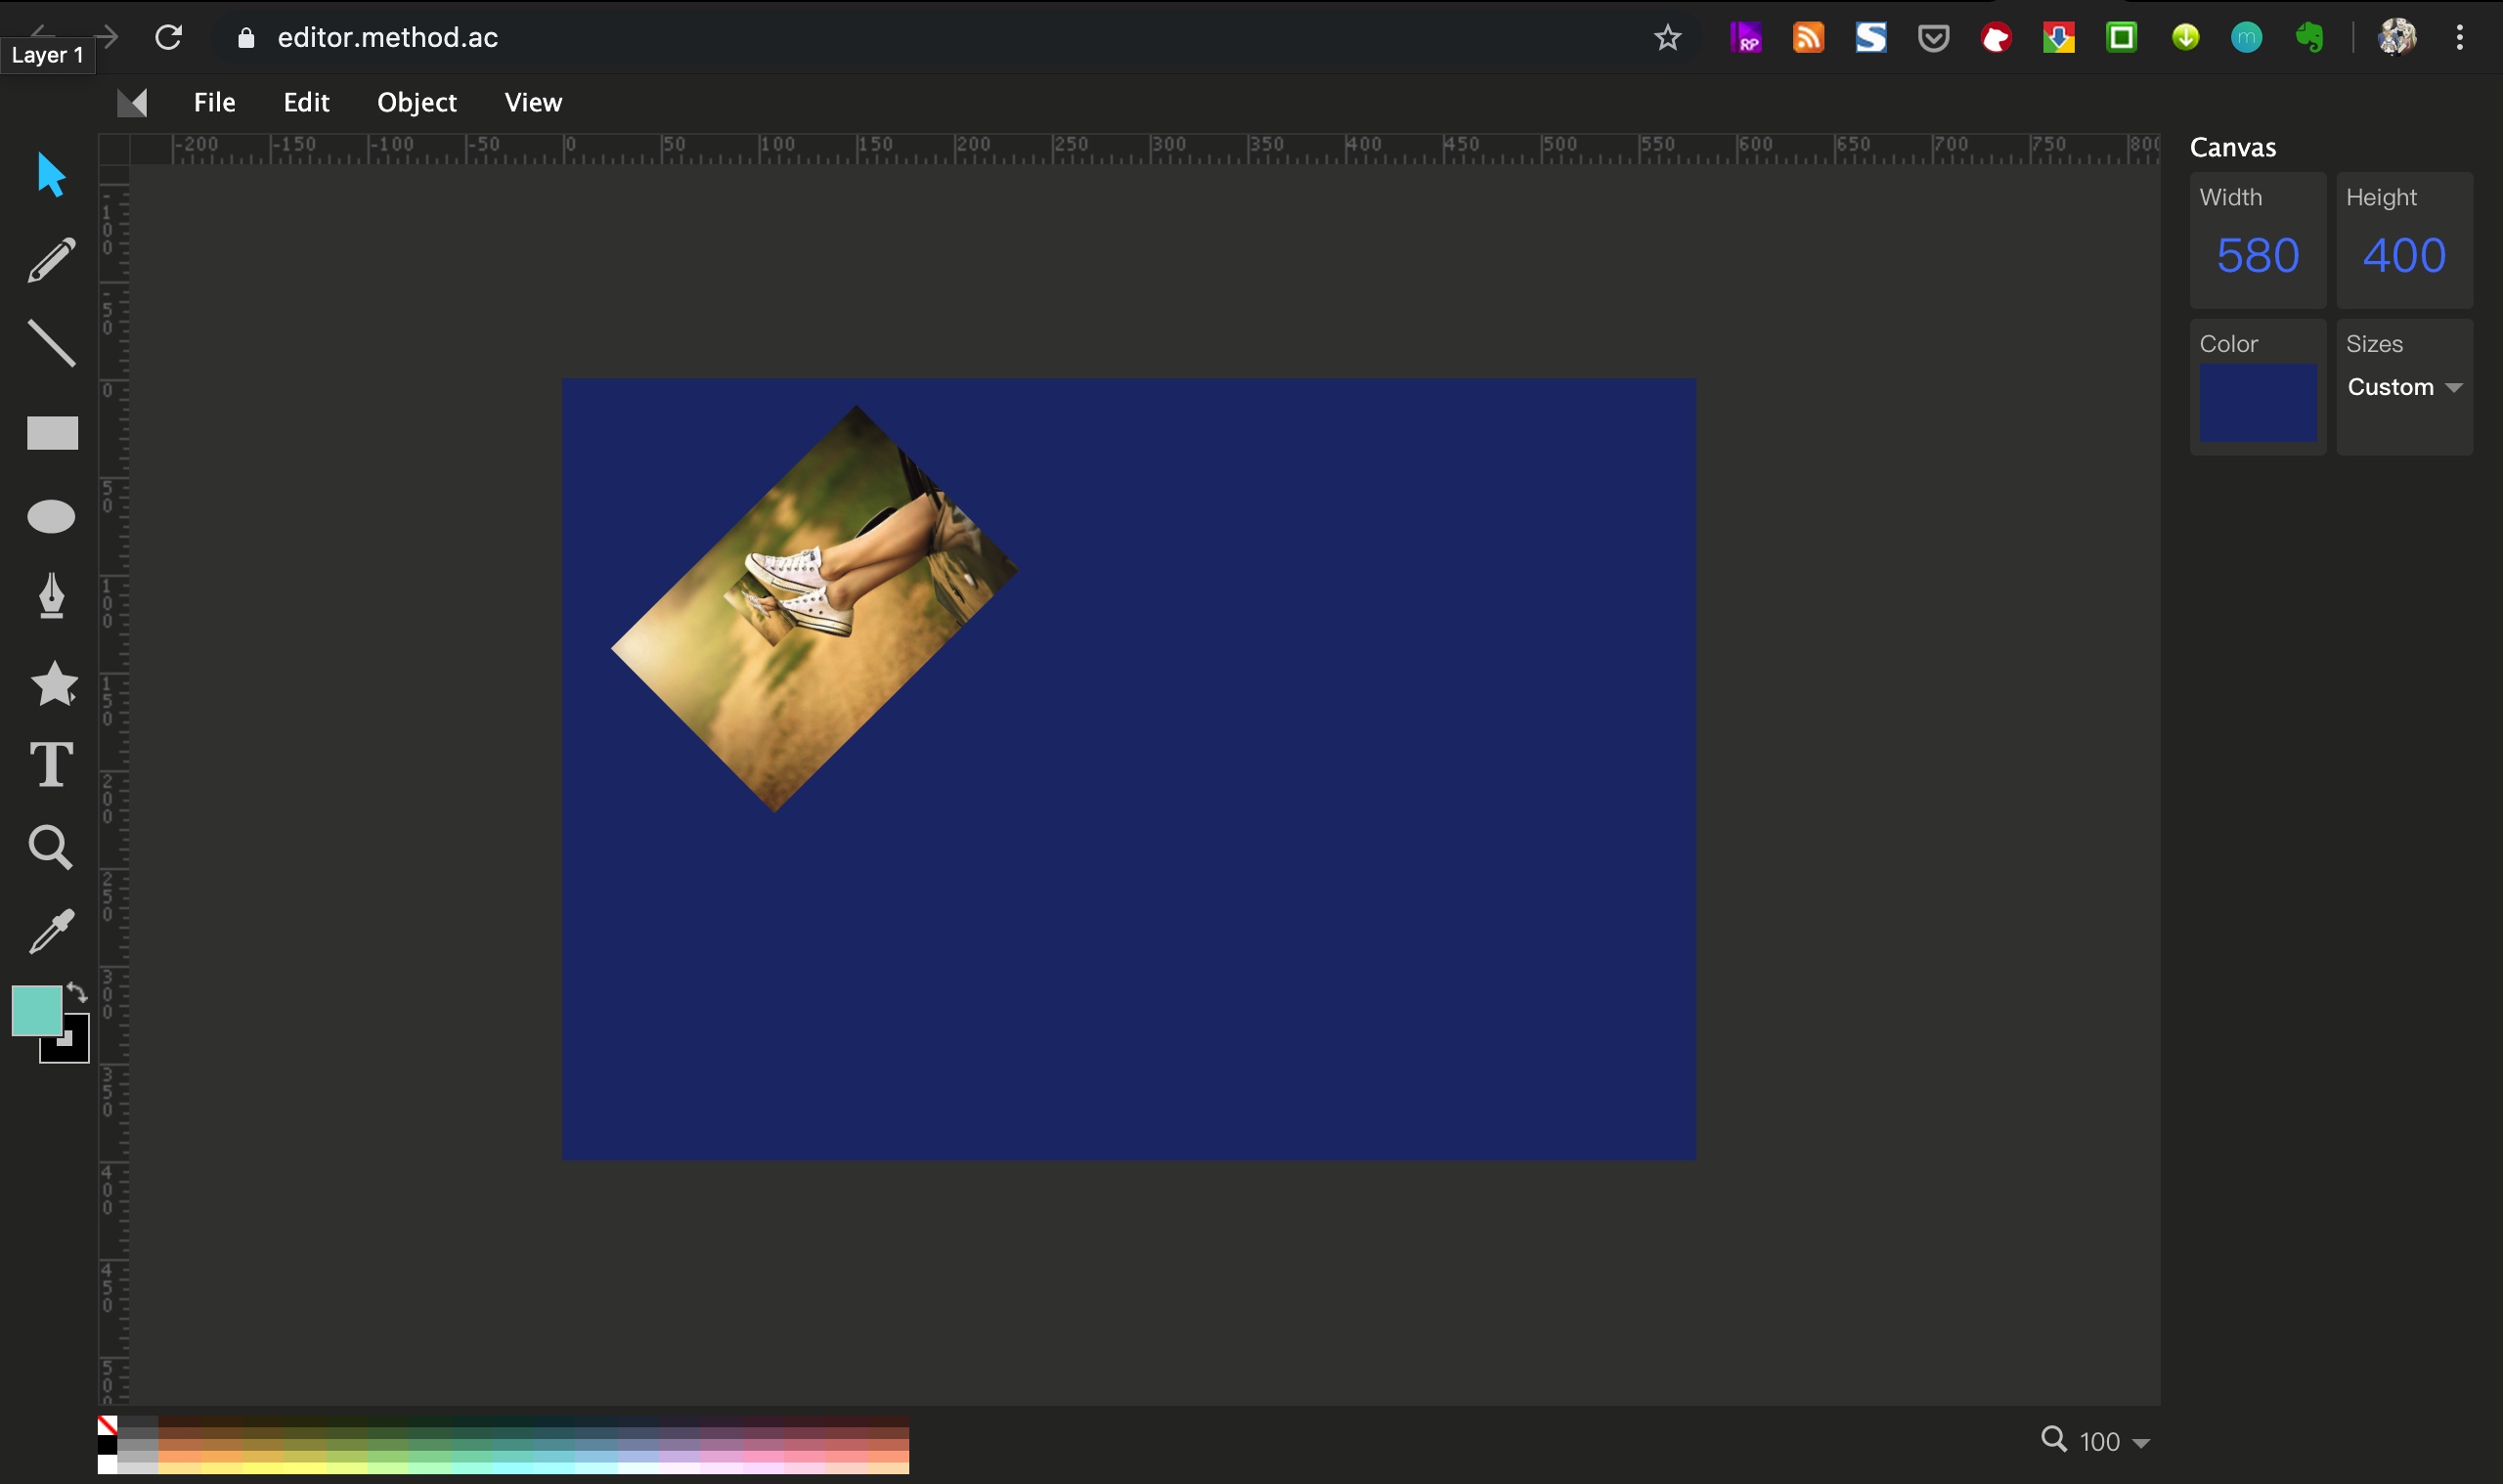
<p>非常非常好的图片Editor </p>

<p><img src="media/15668161054186/15668197183153.jpg" alt="" style="width:1280px;"/></p>

<h3 id="toc_9">yanshuo.io</h3>

<p>用CKeditor来做的？？</p>

]]></content>
  </entry>
  
  <entry>
    <title type="html"><![CDATA[Computer Science课程研究]]></title>
    <link href="http://blog.pengjunjie.com/15667097163627.html"/>
    <updated>2019-08-25T13:08:36+08:00</updated>
    <id>http://blog.pengjunjie.com/15667097163627.html</id>
    <content type="html"><![CDATA[
<p><a href="https://www.cambridgeinternational.org/programmes-and-qualifications/cambridge-international-as-and-a-level-computer-science-9608/published-resources/">官方教育指南</a></p>

<p><a href="https://cie.fraft.org/">AL真题库</a></p>

<p><a href="https://www.ib.redditor.website/">IB指南</a></p>

<p><a href="https://www.linstitute.net/archives/25975#keben">AL 补习</a></p>

<h2 id="toc_0">教材</h2>

<p><a href="https://item.jd.com/55010893594.html">IB -- Core computer science for the IB Dip</a></p>

<p><a href="https://www.lanree.com/product/9781107546738">AL -- Cambridge International AS and A Level Computer Science Coursebook</a></p>

<p><img src="media/15667097163627/4929513d-d9ca-4733-8f16-4406ab9839b7.png" alt="4929513d-d9ca-4733-8f16-4406ab9839b7"/></p>

]]></content>
  </entry>
  
  <entry>
    <title type="html"><![CDATA[Markdown PPT 工具 分析]]></title>
    <link href="http://blog.pengjunjie.com/15667085184036.html"/>
    <updated>2019-08-25T12:48:38+08:00</updated>
    <id>http://blog.pengjunjie.com/15667085184036.html</id>
    <content type="html"><![CDATA[
<p>平时的文档基本上都以markdown形式进行输出，markdown可以导出到blog, gitbook, jekyll等等模型中。那么同时markdown也可以直接生成为对应的PPT，在平时讲解的时候方便直接进行投屏讲解。减少很多的制作PPT需要花费的时间。这里主要整理当下比较流行的markdown模式的ppt工具</p>

<h2 id="toc_0">nodeppt</h2>

<p><a href="https://github.com/ksky521/nodeppt">nodeppt github地址</a></p>

<p>nodeppt 2.0 基于webslides、webpack、markdown-it、posthtml 重构，新效果。<br/>
其中webslides使用<slide>标签的方式进行分页分割。所以对markdown会有一定程度的侵入。</p>

<p>使用npm进行部署，所以安装和使用非常简单，只有2条命令就可以发布markdown到PPT模式。</p>

<p>支持的翻页效果较多，行列式也较多，整体的PPT样式看上去是很不错的。</p>

<p>同时支持echarts、流程图 mermaid，数学符号 KaTeX 三个插件</p>

<p>相关文档支持也比较好</p>

<h2 id="toc_1">webslider</h2>

<p><a href="https://github.com/webslides/WebSlides">webslider</a><br/>
是刚才nodeppt的基础包。这个做出来的东西设计感很强，<a href="https://webslides.tv/demos/">可以点击这里看一下他的demo</a><br/>
但是使用起来是使用XML的模式进行写作，从markdown调整过来会比较复杂。</p>

<h2 id="toc_2">Marp</h2>

<p><a href="https://github.com/marp-team/marp">marp</a><br/>
是一个基于electron框架开发的PPT工具，所以支持多个端。最终还是到网页上进行显示<br/>
他是直接使用markdown在marp工具上进行写作。<br/>
marp当前是第二个版本，版本还在开发中，还不是很成熟。</p>

<h2 id="toc_3">R markdown</h2>

<p><a href="https://github.com/marp-team/marp">一款基于R语言下的markdown幻灯片应用</a></p>

<p>文档比较详实，</p>

<h2 id="toc_4">slides</h2>

<p>这个是做的比较好的基于reveal.js的在线幻灯片制作工具。非开源的</p>

<p><a href="https://github.com/briancavalier/slides">https://github.com/briancavalier/slides</a><br/>
<a href="https://slides.com">https://slides.com</a></p>

<h2 id="toc_5">reveal.js</h2>

<h2 id="toc_6">strut2</h2>

<p><a href="https://github.com/tantaman/Strut">https://github.com/tantaman/Strut</a></p>

<p>非常好的基于3D的带编辑器的幻灯片制作工具<br/>
<img src="media/15667085184036/15668181904898.jpg" alt=""/></p>

<h3 id="toc_7">wtf-slides</h3>

<p><a href="https://github.com/FrankFang/wtf-slides">wtf-slides</a></p>

<p>感觉一般般 ，但是可以学习一下代码</p>

<h3 id="toc_8">matrix</h3>

<p><a href="https://github.com/akira-cn/matrix">matrix</a><br/>
有时间可以研究一下这个，用的几个包还是很不错的</p>

<h2 id="toc_9"><a href="https://github.com/gsuitedevs/md2googleslides">md2googleslides</a></h2>

<p>最后生成google slides</p>

]]></content>
  </entry>
  
  <entry>
    <title type="html"><![CDATA[怎么做好PPT]]></title>
    <link href="http://blog.pengjunjie.com/15665748600560.html"/>
    <updated>2019-08-23T23:41:00+08:00</updated>
    <id>http://blog.pengjunjie.com/15665748600560.html</id>
    <content type="html"><![CDATA[
<h2 id="toc_0">做好PPT的5个方向</h2>

<h3 id="toc_1">Treat your audience as king 听众是上帝</h3>

<p>减少灌输，更多的给听众他需要的内容，使用更易懂的沟通模式。</p>

<h3 id="toc_2">Spread ideas and move people</h3>

<p>较少平白的讲解，图片可以适当的活动，产品的弹出可以加一个突然的动作，以及一些动态的小视频。吸引听众对PPT的注意，需要动态的东西。</p>

<h3 id="toc_3">Help them see what you are saying</h3>

<p>让大家看到你所说的</p>

<ul>
<li>人的思维分为两种，思考者和观察者，让思考者去听和思考，让观察者去观察。所以需要在演讲和PPT两方面去做</li>
<li>使用最少的文字表达你的意思，尽量使用图，减少文字，过多的文字会让听众从你的语言上分心去阅读。</li>
<li>使用脑图更好的表达意思。让听众接受你的思维方式，让你和听众能够有一个一致的思维方式。</li>
<li>将文字改为图片、表格或者图形，更容易吸引人。</li>
</ul>

<h3 id="toc_4">Pratcice design, not decoration</h3>

<ul>
<li>90% 以上的设计都是破坏性的</li>
<li>需要有一个主要要点。每次只显示一个观点，不要把所有的东西一次推给听众。 缩放图片，使其占满幻灯片。删掉不需要的东西</li>
</ul>

<h3 id="toc_5">Cultivate healthy relationships 和幻灯片培养健康的关系</h3>

<ul>
<li>放手幻灯片，不要隐藏在幻灯片后面</li>
<li>打破对幻灯片的依赖，让你和听众做好准备</li>
<li>将文字尽量减到最少，只显示关键的字</li>
<li>然后不停的练习、练习、练习，思考如何和幻灯片的内容结合，最后可以直接面对观众去演讲。让你和观众有眼生的交流和互动</li>
</ul>

<h2 id="toc_6">做好PPT的前期建议</h2>

<p>在讲述之前，首先明确几个事情</p>

<ul>
<li>你跟谁在沟通？——和你的受众保持共识</li>
<li>希望你的受众了解哪些内容或者做什么？ —— 明确希望受众如何反应，并考虑你的沟通方式以及调整基调</li>
<li>如何表达自己的观点？</li>
</ul>

<h3 id="toc_7">了解你的对象</h3>

<p>你的受众</p>

<p>你的受众越具体，你就越能成功地进行沟通。</p>

<p>一次性尝试与太多需求不同的人沟通，远没有与细分的一部分受众沟通高效。</p>

<p>你对受众了解得越多，就越能准确理解如何与之产生共鸣，如何在沟通中满足双方的需求。</p>

<p>你自己</p>

<p>思考你与受众的关系以及你期望他们如何看待你是非常有帮助的。</p>

<h3 id="toc_8">现场演讲的建议</h3>

<ul>
<li>写下每页幻灯片的重点。</li>
<li>大声讲给自己听。这有利于激活大脑半球，从而帮助你记住演讲的重点。这还能迫使你练好幻灯片之间的承接词，避免像其他人一样卡壳。</li>
<li>在朋友或同事面前做一次模拟演讲。</li>
</ul>

<p>简洁的幻灯片用于现场演示（因为你会在现场详细地解释一切），详实的文档则留给受众自行消化。</p>

<h3 id="toc_9">三分钟故事</h3>

<p>三分钟故事就是：如果你只有三分钟的时间把必要的信息告诉受众，你会讲什么？这是确保你对所要讲的故事理解得清晰透彻的好办法。 ——摆脱幻灯片的好办法</p>

<p>三要素：</p>

<ol>
<li>必须能陈述你独特的观点</li>
<li>必须切中要害</li>
<li>必须是一个完整的句子</li>
</ol>

<h3 id="toc_10">故事版——思维导图</h3>

<p><a href="https://zhuanlan.zhihu.com/p/58482531">不懂故事板技术，活该你PPT没逻辑！</a></p>

<p>打算创建内容的可视化大纲，它能确立沟通的结构，是打算创建内容的可视化大纲</p>

<p>可以使用故事版来描述，也可以使用思维导入来描述</p>

<p>不要从幻灯片软件开始。很容易还没想清楚如何组织各个部分就陷入到制作幻灯片的模式中去，最终只留下一套臃肿却言之无物的幻灯片。</p>

<p><img src="media/15665748600560/15665843289625.jpg" alt="" style="width:830px;"/></p>

<h2 id="toc_11">PPT的使用</h2>

<h2 id="toc_12">颜色的选型</h2>

<p>少既是多</p>

<p>根据显示方式来选型</p>

<h3 id="toc_13">开哪些窗口</h3>

<p>选择窗格 —— 图层模式，开启选择窗口适合将哪些显示，哪些隐藏，已经相应的图层顺序 。 类似PS等大多数制图软件。</p>

<p>动画窗格 —— 编辑动画用，基本上所有的动画都在动画窗格可以设计。</p>

<p>在屏幕足够大的时候，建议使用这两个窗格。可以制作大多数的动画效果。</p>

<h3 id="toc_14">图层的使用</h3>

<h3 id="toc_15">组合的使用</h3>

<h3 id="toc_16">动画的使用</h3>

<ul>
<li>多看——别人是怎么玩的</li>
<li>多想——结合自己的使用</li>
</ul>

<h3 id="toc_17">图片的选择</h3>

<ul>
<li>尽量使用PNG图片</li>
<li>查找图片的方式</li>
<li>尽量使用高清图，最后可以压缩图片</li>
</ul>

<h3 id="toc_18">母版</h3>

<p>每个PPT前都需要整理的</p>

<h2 id="toc_19">注意事项</h2>

<h3 id="toc_20">两种不同形式的PPT</h3>

<h4 id="toc_21">查看型PPT</h4>

<ul>
<li>尽量多以图表、标题、图片形式去讲述</li>
<li>必要的文字描述可以放在备注中</li>
<li>可以直接画一些框架模块图</li>
<li>颜色可较丰富</li>
<li>较少的动作，方便PDF形式表述</li>
</ul>

<h4 id="toc_22">讲述型PPT</h4>

<ul>
<li>减少颜色，准确的是减少色系</li>
<li>减少页面元素，突出重点</li>
<li>可以用动作来吸引注意，使用动作来帮助理解</li>
<li>增加视频内容</li>
<li>少用文字，将文字变为图表、图片的形式</li>
<li>结合脑图</li>
</ul>

<h2 id="toc_23">模板的使用</h2>

<p>图表、图标</p>

<h2 id="toc_24">PPT、Prezi和Snow</h2>

<p>PPT ——  线性的讲述模式，现在大多数ppt的模式给人以一种线性的思维定型模式。其实PPT式可以支持多种模式的，但是大多数的模板以及一般的思维都将PPT固定为一种线性模式了，一篇到另一篇都是一个线性的结果。</p>

<p>Prezi —— Prezi的特点是缩放用户界面，在演讲过程中可以根据进程放大缩小。总的来说prezi是一个二维结构，可以缩放、旋转、无边界、在线编辑、实时保存、简单易用。</p>

<p><a href="https://prezi.com/explore/">Prezi explorer</a></p>

<p>参考两个得奖Prezi<br/>
<a href="https://prezi.com/fugumlghvxoy/malmaison-hotel-du-vin-prezi-design/">malmaison-hotel</a></p>

<p>Strut —— Strut实际上是一个三维空间的ppt，可以有x、y、z三个轴，来进行三维的跳动，从而能够给予更多一维的空间，同时也赋予了一定的prezi的缩放、旋转、无边界功能（但是这几个功能缺失没有Prezi做的强大）。另一个突出点就是Strut不需要客户端，直接在浏览器端制作，浏览器端播放，随时随地能够查看。</p>

<h2 id="toc_25">附件</h2>

<h3 id="toc_26">配色网站</h3>

<p><a href="https://color.adobe.com/zh/create">adobe配色网站</a><br/>
<a href="https://www.colourlovers.com/">www.colourlovers.com</a></p>

<h3 id="toc_27">图片素材站</h3>

<p><a href="https://images.google.com/?gws_rd=ssl">google image</a><br/>
<a href="https://unsplash.com">unsplash</a><br/>
<a href="https://huaban.com/">花瓣</a><br/>
<a href="https://www.iconfont.cn/">阿里图标库</a><br/>
<a href="https://freebiesbug.com/">免费资源站</a></p>

<h3 id="toc_28">百度网盘</h3>

]]></content>
  </entry>
  
  <entry>
    <title type="html"><![CDATA[django Template中取多对多关系]]></title>
    <link href="http://blog.pengjunjie.com/15664398191204.html"/>
    <updated>2019-08-22T10:10:19+08:00</updated>
    <id>http://blog.pengjunjie.com/15664398191204.html</id>
    <content type="html"><![CDATA[
<pre><code class="language-python">{% for place in places %}
    Name: {{ place.name }}&lt;br/&gt;
    Area: &lt;br/&gt;{% for area in places.area.all %}{{ area }}&lt;br/&gt;{% endfor %}
{% endfor %}
</code></pre>

<p>在Template中可以取到多对多关系，使用不带括号的搜索就可以拿到。</p>

<p>也可以使用</p>

<pre><code class="language-python">{% for place in places %}
    Name: {{ place.name }}, Area: {{ place.area.all|join:&quot;, &quot; }}
{% endfor %}
</code></pre>

<h2 id="toc_0">查询模式2</h2>

<p>将查询到的内容批量存入context中</p>

<pre><code class="language-python">from myapp.models import Area, Place

def detail(request, place_id):
    place = Place.objects.get(pk=place_id)
    areas = place.area.all()

    return render_to_response(&#39;detail.html&#39;, {
        &quot;place&quot;: place,
        &quot;areas&quot;: areas,
    })
</code></pre>

<pre><code class="language-python">&lt;h3&gt;{{ place }}&lt;/h3&gt;

{% if areas %}
  &lt;ul&gt;
  {% for area in areas %}
    &lt;li&gt;{{ area.name }}&lt;/li&gt;
  {% endfor %}
  &lt;/ul&gt;
{% endif %}
</code></pre>

]]></content>
  </entry>
  
</feed>